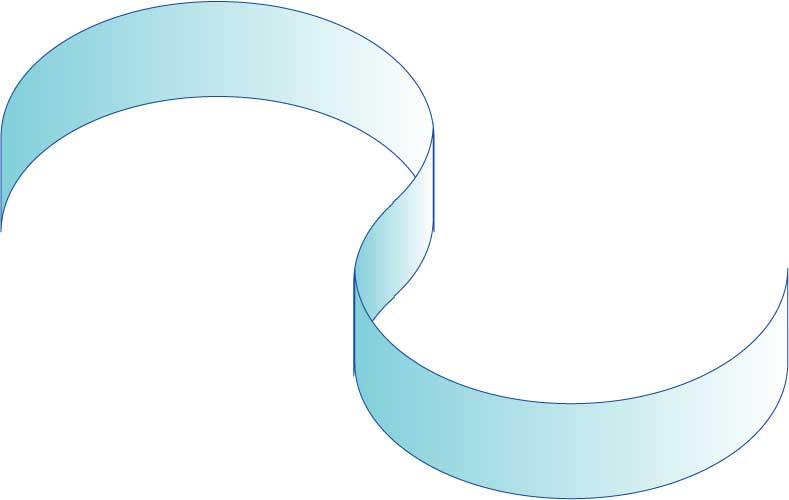
WordPress、Photoshop、Illustratorも教えるパソコン教室


Step 1 – リボンを作ります

ペンツールでリボンの上線を引きます

Step 1 - draw the first part of the ribbon

shiftキー、ALTキーでリボンの下線をコピーします

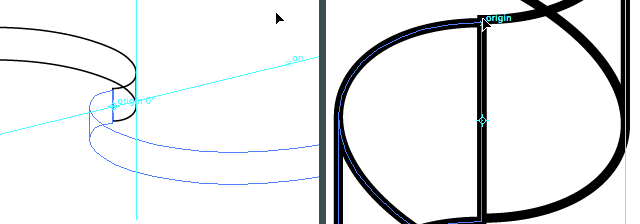
Step 2 – はさみツールで線を切ります

Step 2 - break the curve into 2 parts

Step 3 – 開かれたパスを閉じます

パスを閉じることで、リボンが二つのパーツに別れます

Step 3 - close the paths

Step 4 – 二つのリボンのパーツをコピーし、反転

Step 4 - rotate and duplicate the 2 segments of the ribbon

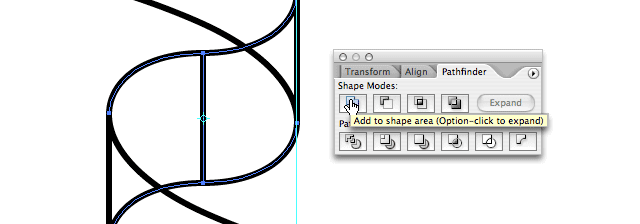
Step 5 – 中央の二つのパーツをパスファインダーの”Add to shape” で結合します。

Step 5 - merge the middle segments of the ribbon into 1 segment

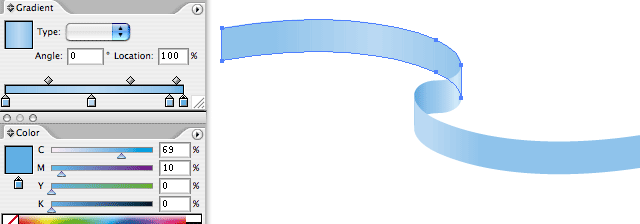
Step 6 -全体を選んでグラデーションをかけます

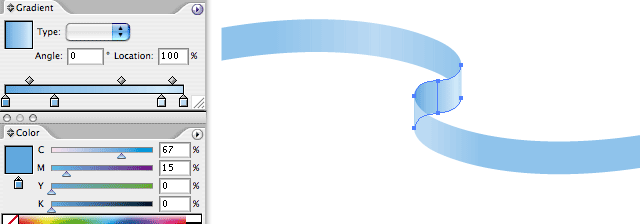
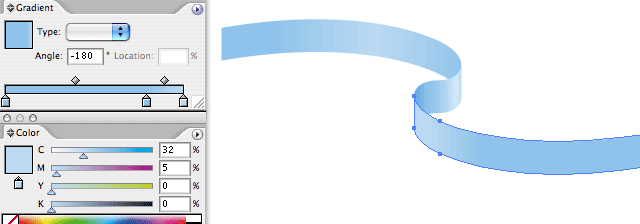
今このリボンは3つのパーツでできています。左のパーツのグラデーションの設定

Step 6 - giving the ribbon segments a gradient fill

中央のパーツのグラデーションの設定

Step 6 - giving the ribbon segments a gradient fill

右のパーツのグラデーションの設定

Step 6 - giving the ribbon segments a gradient fill

私が作りました

Step 6 - giving the ribbon segments a gradient fill