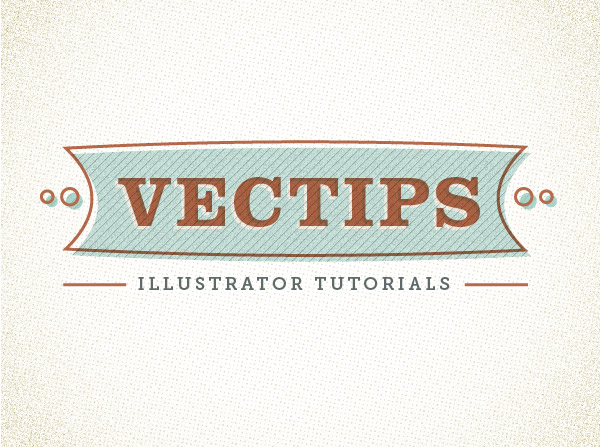
Final Image
Below is the final type treatment we will be working towards.

Tutorial Details
- Program: Adobe Illustrator CS5 (You should be able to create this tutorial in CS4 and CS3 but some of the tutorial images might look different.)
- Difficulty: Beginner / Intermediate
- Topics Covered: Appearance Panel, Effects
- Estimated Completion Time: 15-20 minutes
Step 1
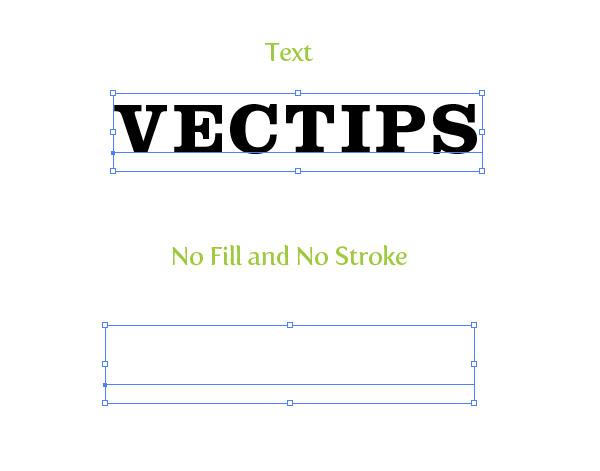
Create a new document and type out some text with the Text tool (T). I used Clarendon Bold at 48 pt. Take off any stroke and fill on the text.
Step 2
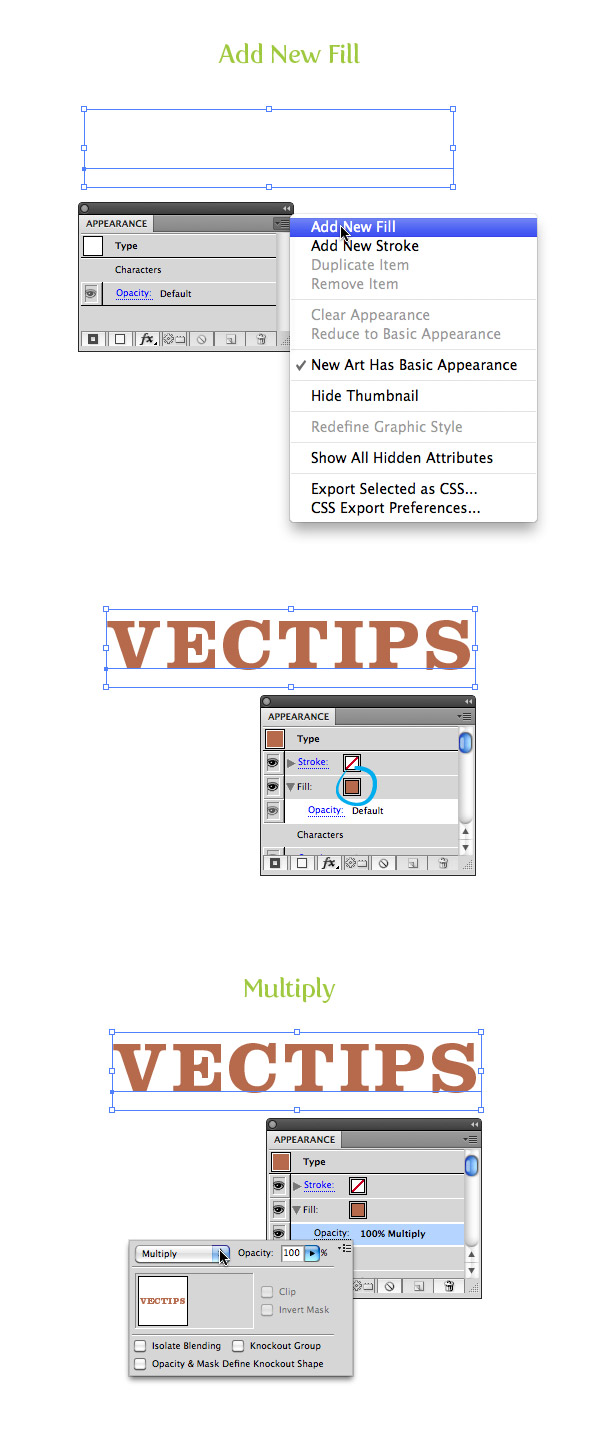
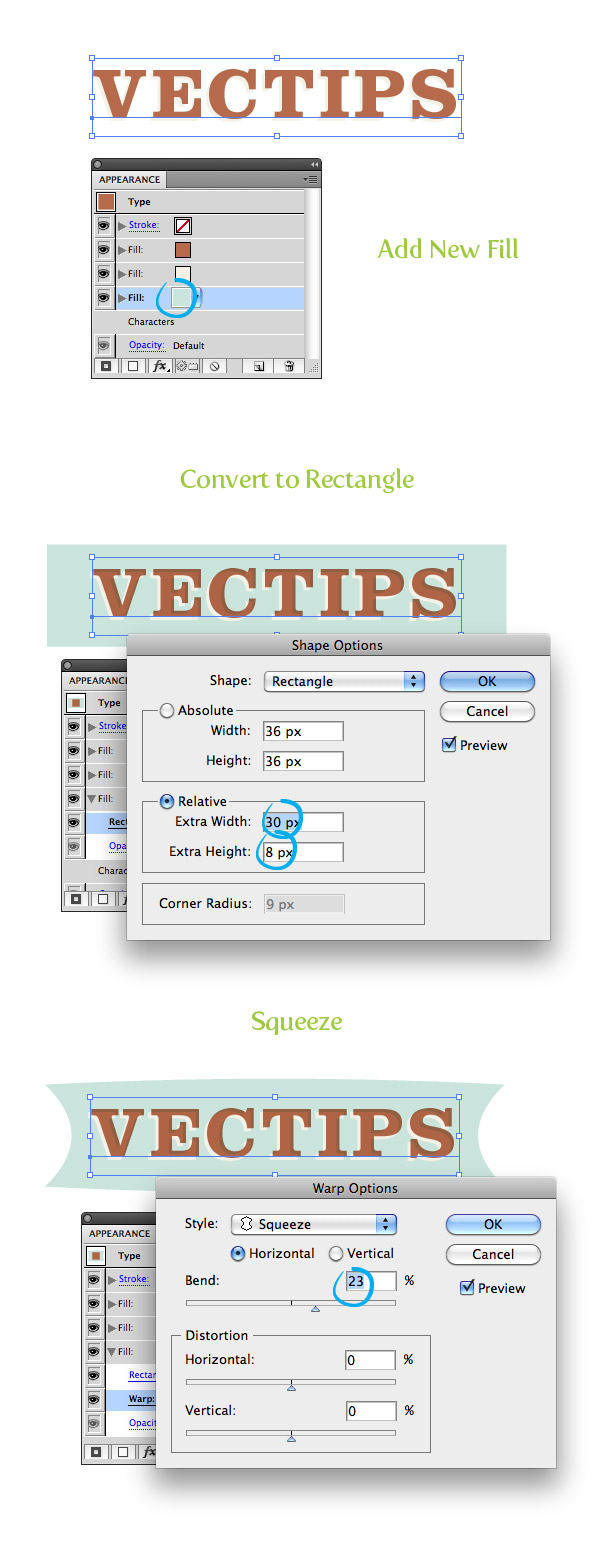
With the text still selected, choose Add New Fill from the pop-up menu of the Appearance panel. Fill the new fill with a reddish orange color. In the Appearance panel, press the drop-down arrow for the new fill to reveal its attributes. Press the Opacity link and change the Blending Mode to Multiply.
Step 3
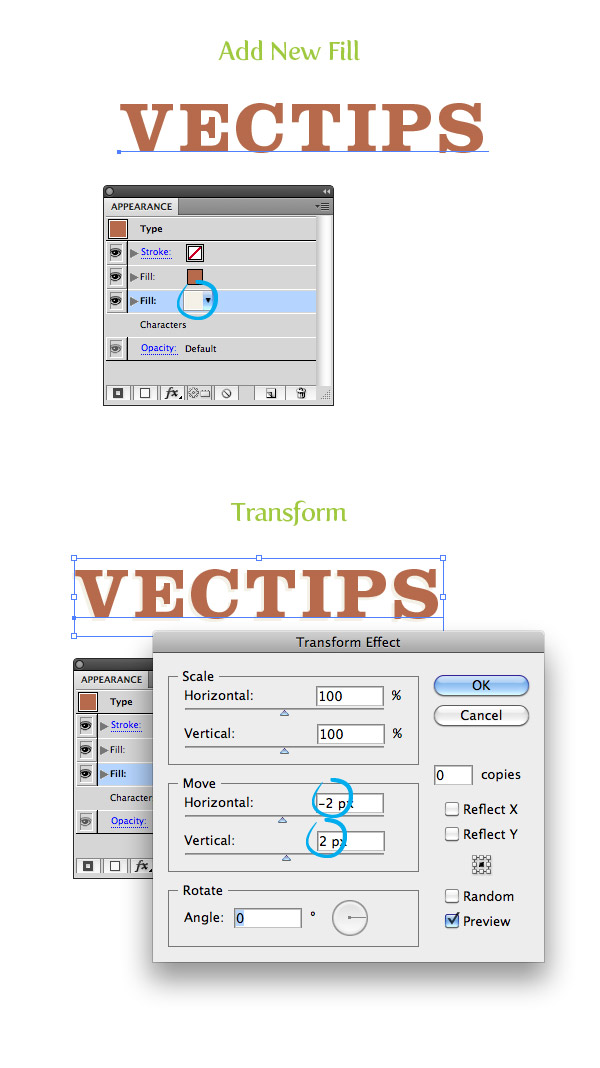
Create another new fill in the Appearance panel, select the bottom fill item, and fill it with a light yellow color. With the light yellow fill item selected in the Appearance panel, go Effect > Distort & Transform > Transform. In the Transform dialog, change the Horizontal Move to -2 px and the Vertical Move to 2 px.
Step 4
Create another new fill, select the bottom fill item, and fill it with a light aqua color. With the aqua color fill item selected, go Effects > Convert to Shape > Rectangle. In the Rectangle dialog, select the Relative radial button, change the Extra Width value to 30 px and the Extra Height to 8 px. With the aqua fill item still selected, go Effects > Warp > Squeeze. In the Warp Options dialog, select the Horizontal radial button and change the Bend to 23.
Step 5
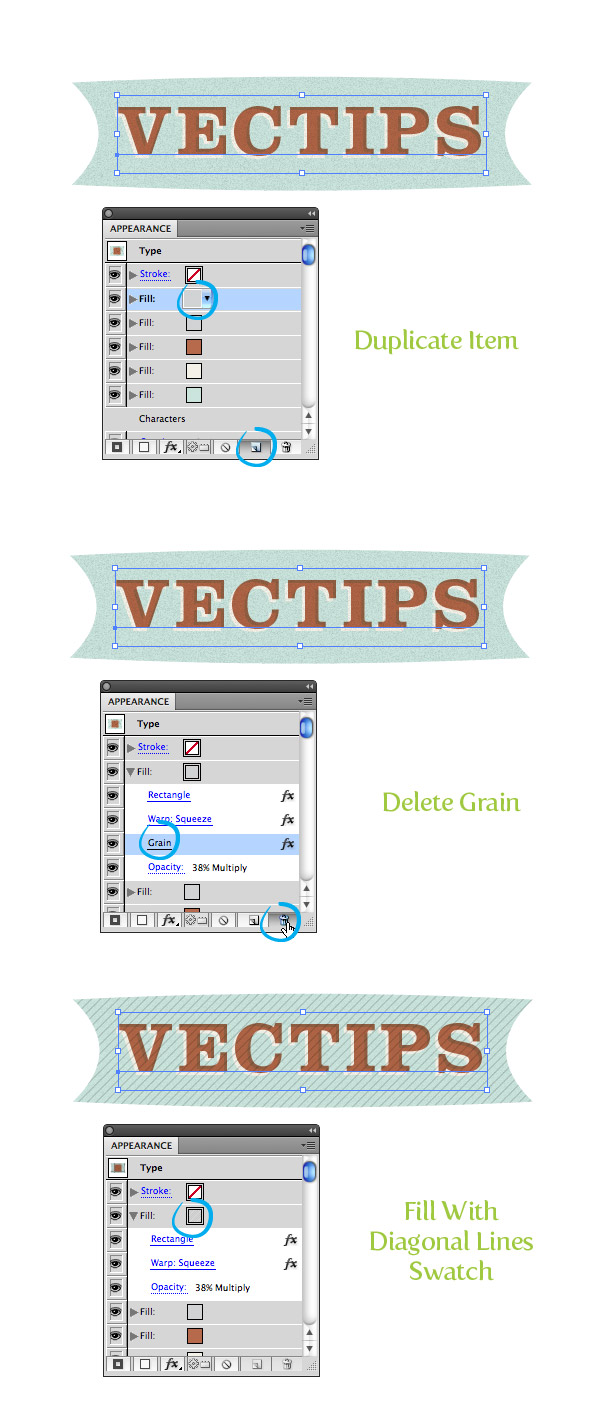
With the aqua item selected, press the Duplicate Selected Item button at the bottom of the Appearance panel. In the Appearance panel drag one of the aqua copies above the first reddish fill item. Change the fill of the top item to a light gray. With the item still selected, go Effects > Texture > Grain. In the Grain dialog, change the Intensity to 78, the Contrast to 50, and the Grain Type to Sprinkles. Change the Blending Mode of the gray fill to Multiply and change the Opacity to 38.

Step 6
Duplicate the grain fill item, select the top copy, and expand the attributes. Select the Grain attribute and press the trash icon at the bottom of the Appearance panel. Fill the selected item with a Diagonal Line swatch (this can be found by pressing the bottom left Swatch Libraries icon in the Swatches panel then navigating Patterns > Basic Graphics > Basic Graphics_Textures).
Step 7
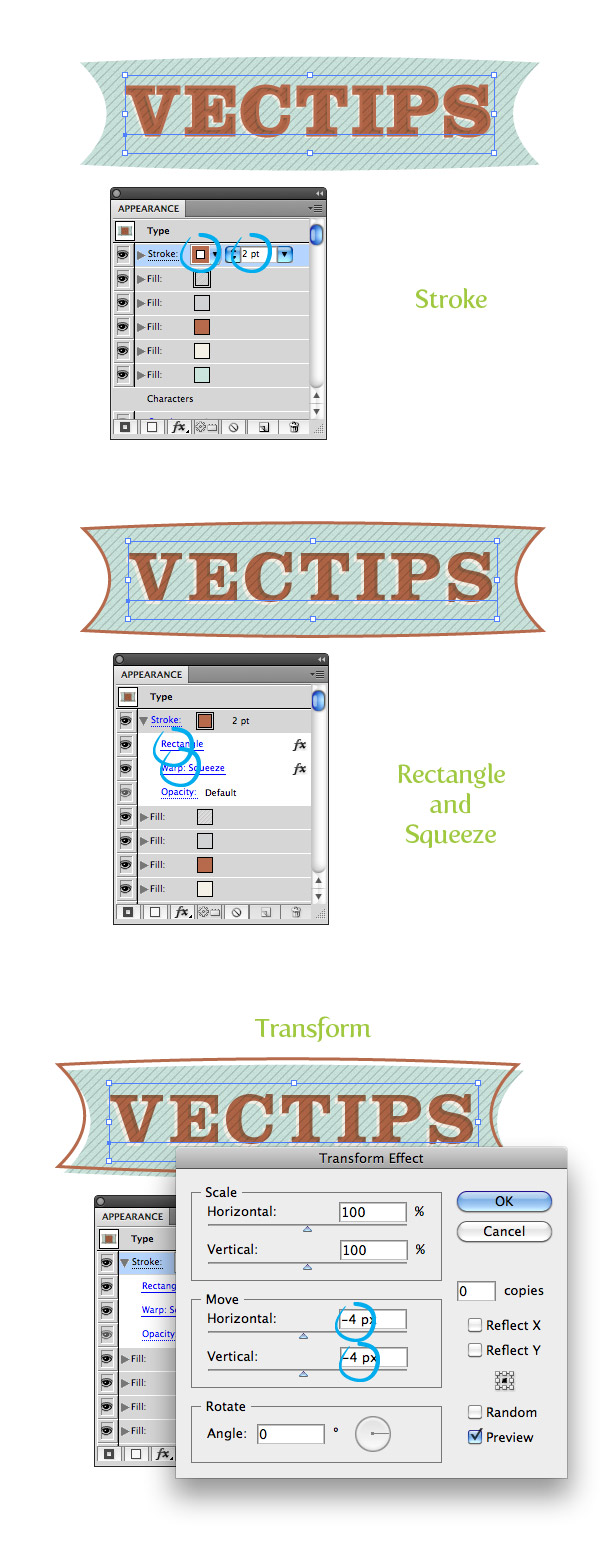
Select the empty stroke item at the top of the Appearance panel, (if your empty stroke item is not at the top, drag it up to the top) fill the stroke with your reddish color, and change the weight to 2 pt. Change the stroke to have the same rectangle and squeeze settings as the previous fill items and set the Blending Mode to Multiply. With the stroke still selected, go Effect > Distort & Transform > Transform and in the Transform dialog, change the Horizontal Move to -4 px and the Vertical Move to -4 px.
Step 8
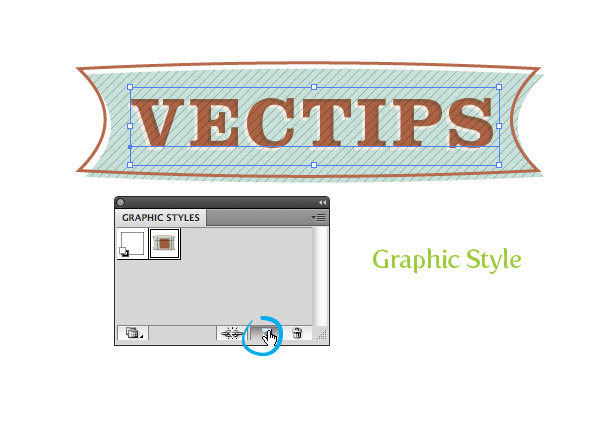
That’s pretty much it for the text treatment! I like to save it as a Graphic Style so I can apply it to other artwork. To create a Graphic Style, select the text and the press the New Graphic Style Button in the Graphic Styles panel. Now you can add the effect to other elements like in the final preview image.
Final Image
Again, here is the final image!
