

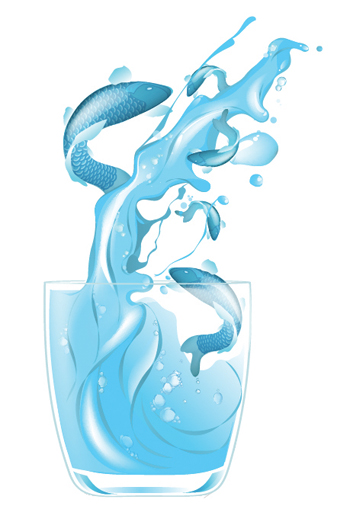
Creating convincing liquid effects in vector illustration can be a tricky business. Luckily, Jing Zhang has provided us with this tutorial that shows you how to make a real splash with your art.
You’ll learn numerous Illustrator techniques to create vector liquid, by playing around with Illustrator’s Mesh tool, Warp tool and layer blending properties.
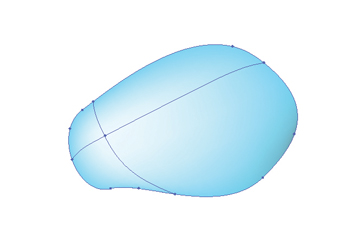
The Mesh tool is often overlooked, but it is one of Illustrator’s most powerful tools. You can use it to create realistic 3D effects and it allows you to give your work a unique finish.
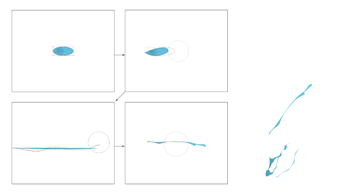
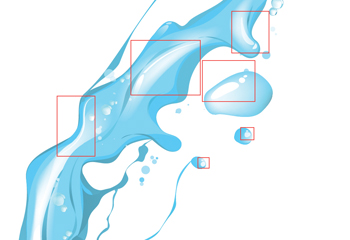
Step 1 Fire up Illustrator and using the Pen tool (P), draw a basic shape of a water splash. Speed up your tracing progress by using keyboard shortcuts as you draw, such as the Selection tool (A), Direct Selection tool (V), Convert Anchor Point (Shift + C), Pen tool (P), Add Anchor Point (+) and Delete Anchor Point (-).
Step 2 Copy the object you just created and use Ctrl/Cmd + F to paste it in the same place twice. The more layers there are, the better the effect will be. Next, click on the Warp tool (Shift + R) and using the default setting, warp the top and the middle layer as shown in the picture above.
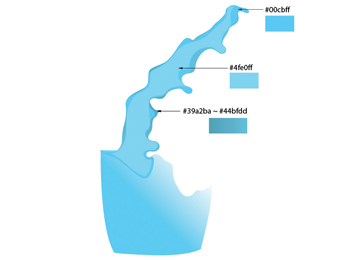
Step 3 Colour all the objects in blue, either using the Pantone shades shown above, or by creating your own – just make sure the outer layer is in the darkest colour and the inner one the lightest.
You’ll learn numerous Illustrator techniques to create vector liquid, by playing around with Illustrator’s Mesh tool, Warp tool and layer blending properties.
The Mesh tool is often overlooked, but it is one of Illustrator’s most powerful tools. You can use it to create realistic 3D effects and it allows you to give your work a unique finish.
Step 4 Fire up Illustrator and using the Pen tool (P), draw a basic shape of a water splash. Speed up your tracing progress by using keyboard shortcuts as you draw, such as the Selection tool (A), Direct Selection tool (V), Convert Anchor Point (Shift + C), Pen tool (P), Add Anchor Point (+) and Delete Anchor Point (-).
Step 5 Copy the object you just created and use Ctrl/Cmd + F to paste it in the same place twice. The more layers there are, the better the effect will be. Next, click on the Warp tool (Shift + R) and using the default setting, warp the top and the middle layer as shown in the picture above.
Step 6 Colour all the objects in blue, either using the Pantone shades shown above, or by creating your own – just make sure the outer layer is in the darkest colour and the inner one the lightest.
Step 7 Next, we’ll add the highlights. On the top layer, use the Pen tool (P) to draw up an object similar to the one shown. Try to use as few anchor points as possible to avoid complicating the mesh later. Fill the shape with the same colour as the top splash layer – the lightest blue. Using the Mesh tool (U), click on the centre of the highlight, and fill the anchor point with white colour. Adjust the anchor point and its arrows to make it look smooth.
Repeat this technique on the other areas of the splash, creating more highlights until your picture starts to look glossy.
Step 8 With the Ellipse tool (L), draw an ellipse object of any size. By stretching and warping the object with the Warp tool (Shift + R), you can ‘liquefy’ its shape naturally. Add some dark twisted strokes to make up the motion of the splash. In illustration, details define the quality, so it’s definitely worth taking more time over this step.
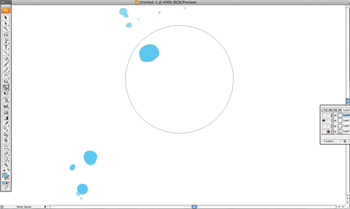
Step 9 Still with the Ellipse tool (L) selected, create a few water drops of various transparencies. As real water drops are rarely uniform in shape use the Warp tool (Shift + R) again to make them look more realistic.
Step 10 Select a few of the main water drops and make them more solid with the Mesh Tool (U), using the method described in Step 4. You can even change the colour some of the anchor points to a darker shadow colour.
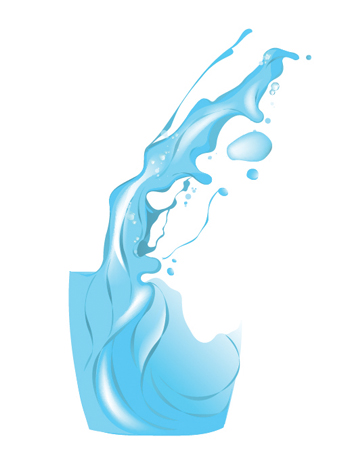
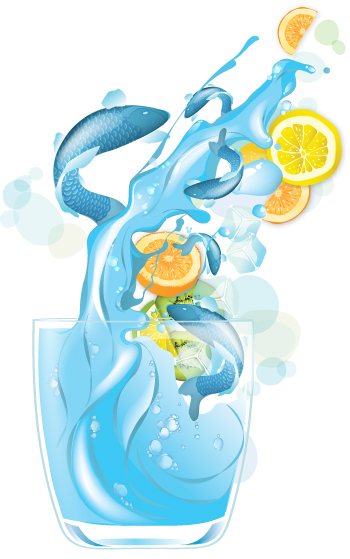
Step 11 Composition is crucial, particularly in a piece with lots of natural elements, so be careful not to overdo any particular sections. Here, I’ve given prominence to the right-hand side of the splash, where the water pours.
Step 12 Add sparkling highlights to your splash as shown here. Vary the opacity of each highlight shape from 50% to 95%. This subtle detail will dramatically improve the texture’s appearance.
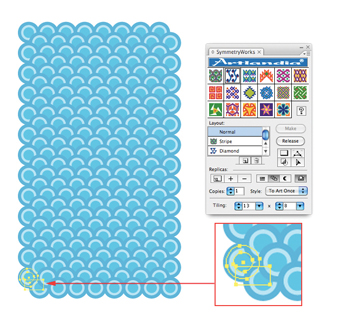
Step 13 To create the Koi carp, I used the help of a plug-in called SymmetryWorks to make the fish scales. You don’t need the plug-in to make them, but it saves a lot of time! You can either download it fromartlandia.com/products/SymmetryWorks and follow my settings as shown above, or you can create your own. Then, with your pattern selected, go to Object > Expand.
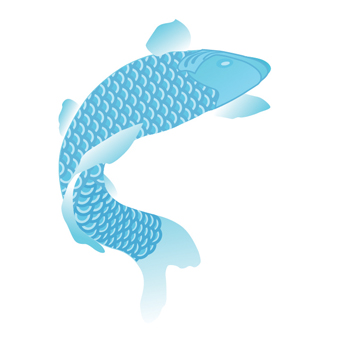
Step 14 Draw a Koi carp and duplicate the body shape, using one as a mask for the fish scale (Ctrl/Cmd + 7). Colour the other parts with gradient colour. With luck, your Koi carp should look similar to the one here on the right.
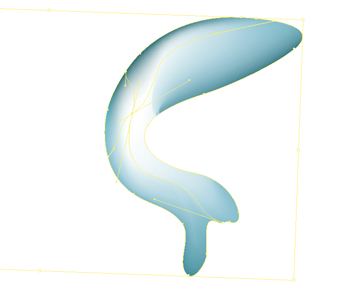
Step 15 To make the fish look solid, duplicate its body and fill it with darker blue colour. Next, apply the Mesh tool (U) and, using the same method as described in steps 4 and 7, add an anchor point in the middle, and fill it with white. Click on Opacity in the menu bar and set the blending mode to Multiply in the drop-down menu.

Step 16 To add extra highlights to the fish, use the Pen tool (P) to draw a blue shape, repeat the Mesh tool method and fill the middle anchor point with white colour. Finally, change the blending mode to Lighten.
Copy and paste the Koi carp to different areas and vary their size and rotation. Use the layer stack to place them in front and behind the water.
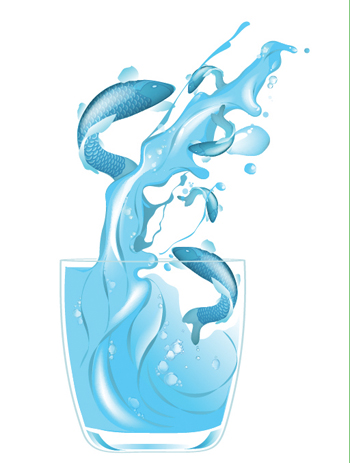
Step 17 We’re almost there, so lets add in the glass now. Use the Pen tool (P) to draw the outline of a glass with a stroke weight of about 3pt.
Step 18 Finally, duplicate the glass object but close the path, and fill it with dark grey. Use the Mesh tool (U) to add a few anchor points. Change the colour of some of the anchor points to white.
Next, change the blending mode to Screen and set the opacity to 69%. Save this as a new layer at the top of the stack. I’ve included some additional elements in my finished design – fruit slices and ice – so why not add your own touches?