Final Product What You’ll Be Creating

Step 1
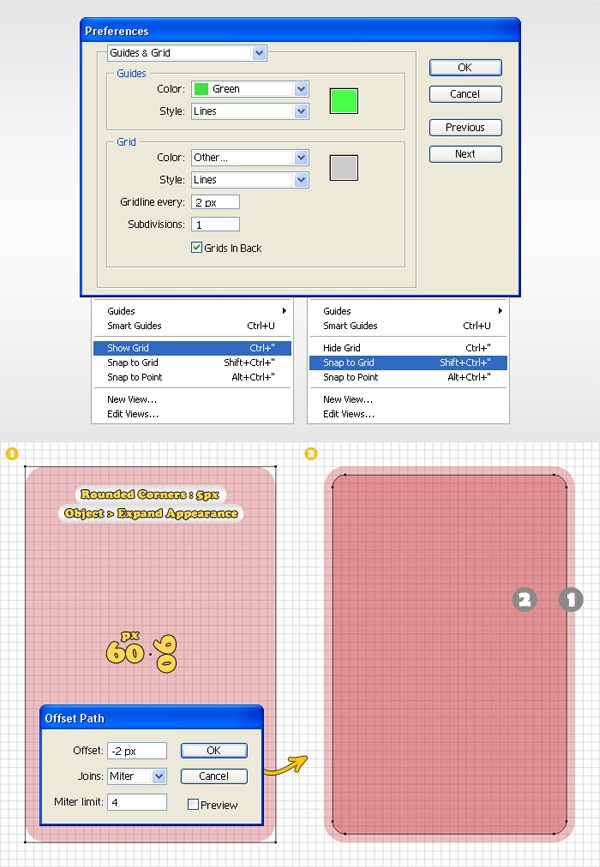
Create a 700 by 220px document. First, turn on the Grid (View > Show Grid) and the Snap to Grid (View > Snap to Grid). Now, you need a grid every 2px. Go to Edit > Preferences > Guides & Grids then enter "2" in the "Gridline Every:" box and "1" in the "Subdivision:" box. You should also open the Info panel so that you can easily see the values for width and height for any shape.
All these options will significantly increase your work speed. Select the Rectangle Tool(M) create a 60 x 90px shape, add a 5px Rounded Corners effect (Effect > Stylize > Rounded Corners) then go to Object > Expand Appearance. Select the resulting shape and go to Object > Path > Offset Path. Enter a "-2px" Offset and click OK. Now you should have two shapes (as shown in image #2). Name them "1" and "2".
Step 2
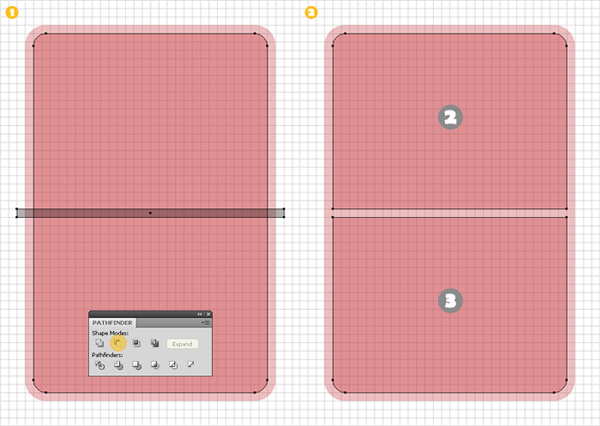
Pick the Rectangle Tool (M) and create a rectangle like the grey one shown in image #1. Select it along with "2" and click on the Minus Front button from the Pathfinder panel. Name the resulting shapes "2" and "3".
Step 3
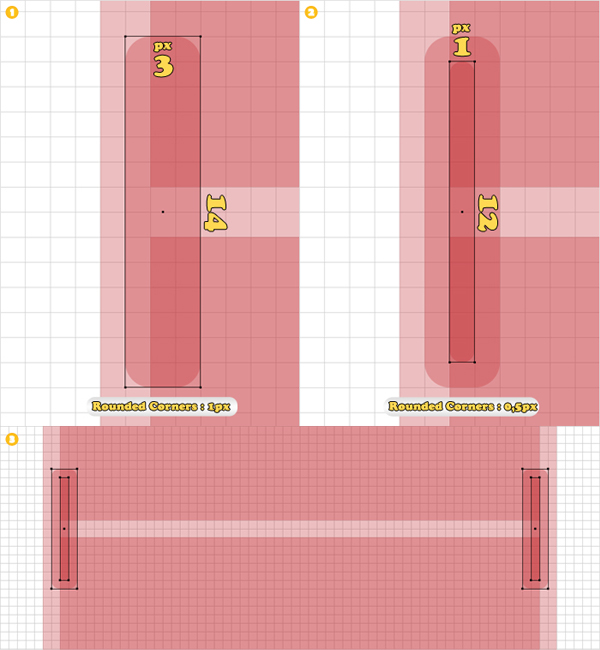
Go to Edit > Preferences > Guides & Grids then enter "1" in the "Gridline Every:" box. With the Rectangle Tool (M), create a 3 x 14px shape and add a 1px Rounded Corners effect. Create a second shape (1 by 12px) add a 0,5px Rounded Corners effect and place it like in image #2. Duplicate these two shapes. Now, reselect these four shapes and place them like in the final image. Take a closer look at the grid to understand the exact position.
Step 4
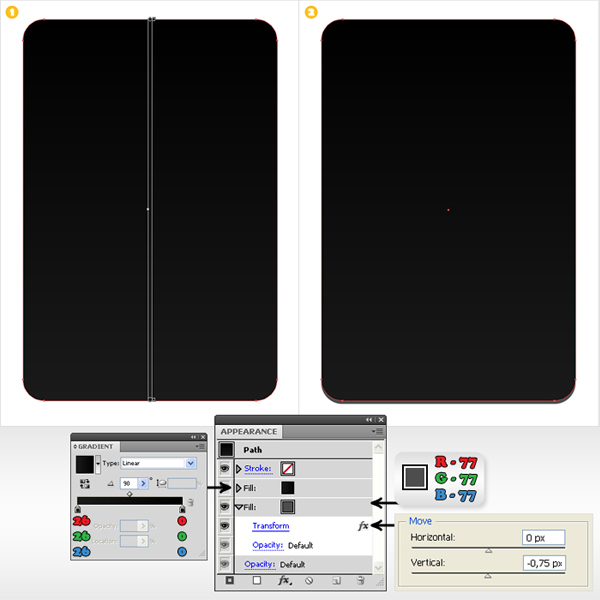
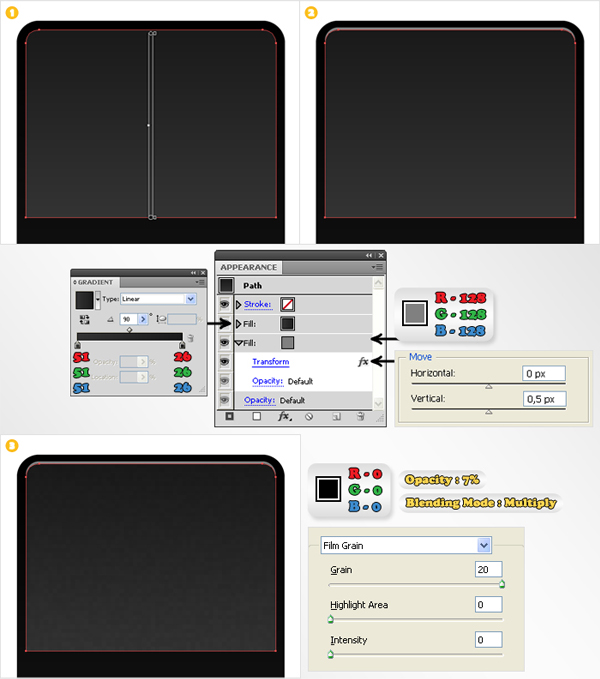
Select shape "1" and fill it with the linear gradient. Add a new fill (from the flyout menu of the Appearance panel) and use the color shown below (R=77 G=77 B=77). Select this second fill (from the Appearance panel), move it below the original fill then go to Effect > Distort & Transform > Transform. Go to the Move section, enter "-0,75" in the vertical box then click OK.
Step 5
Duplicate shape "2". Select the original shape and fill it with the linear gradient. Add a new fill (from the flyout menu of the Appearance panel) and use the color shown below (R=128 G=128 B=128). Select this second fill (from the Appearance panel), move it below the original fill then go to Effect > Distort & Transform > Transform. Go to the Move section, enter "0,5" in the vertical box then click OK. Now, select the copy of "2" and Bring it to Front (Shift + Control + Right Square Bracket). Fill it with black, lower its opacity to 7%, change the blending mode to Multiply then add the Film Grain effect (Effect > Artistic > Film Grain).
Step 6
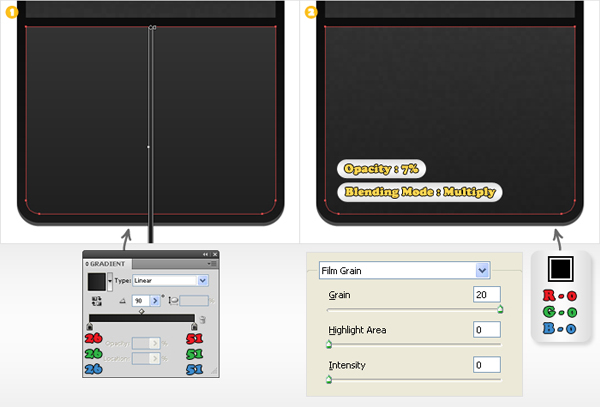
Duplicate shape "3". Fill the original shape with the linear gradient and the copy with black. Select the copy, lower its opacity to 7%, change the blending mode to Multiply then add the Film Grain effect (Effect > Artistic > Film Grain).
Step 7
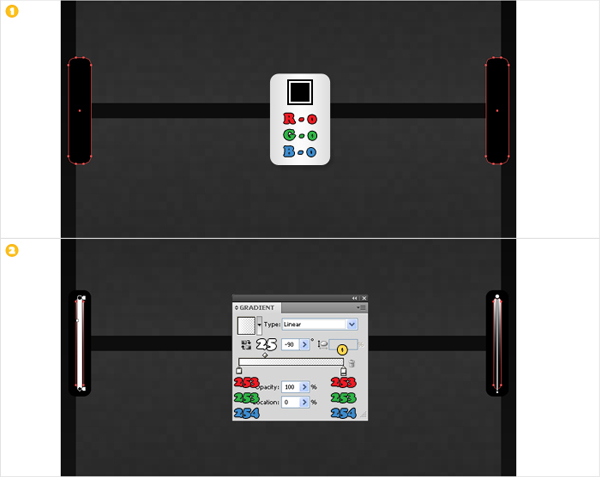
Select the shapes made in the third step. Fill the big ones with black and the small ones with the linear gradient.
Step 8
Select all the shapes created so far and group them. Name this group "01". Go to Edit > Preferences > Guides & Grids and enter "10" in the "Gridline Every:" box. Now, create some copies for group "01" and place them like in the following image. The Snap to Grip will ease your work.
Step 9
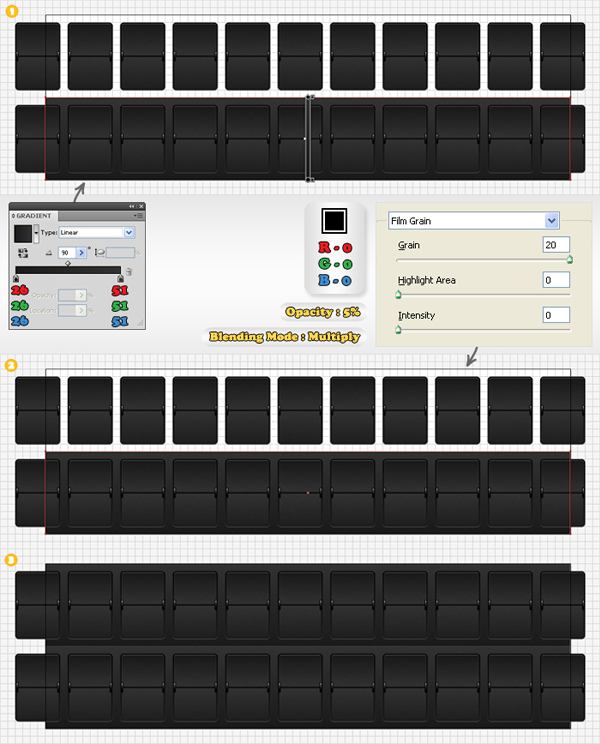
Select the Rectangle Tool (M) and create shape in the back of the bottom row (image #1). Fill it with the linear gradient then duplicate it. Select the copy and make it black. Lower its opacity to 5%, change the blending mode to Multiply then add the Film Grain effect (Effect > Artistic > Film Grain). Duplicate these two rectangles and move the copies up, behind the top row.
Step 10
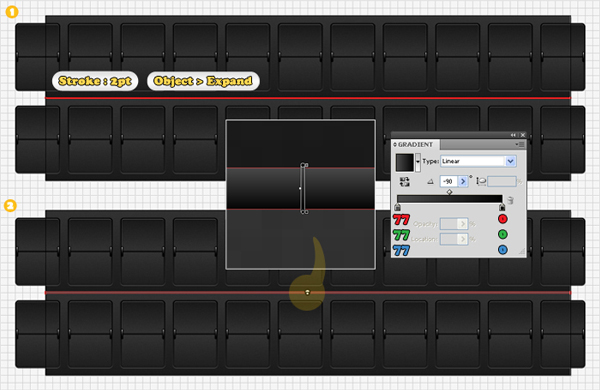
Select the Pen Tool (P) and draw a horizontal path as shown in image #1. Fill it with none and add a 2pt stroke. Expand this stroke then fill the resulting shape with the linear gradient.
Step 11
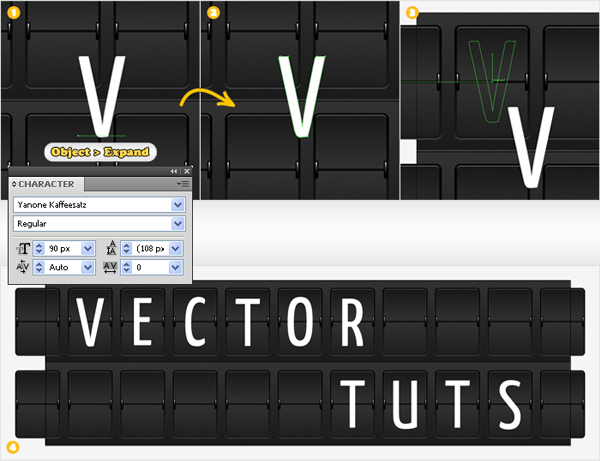
Now, the text. First, disable the Snap to Grid and enable the Smart Guides. Select the Type Tool (T) and add your text. Use the Yanone Kaffeesatz font. Expand your text then place each character in the middle of a group. The Alignment Guides should ease your work. Select the letter shapes from the top row and group them. Do the same with the letter shapes from the bottom row.
Step 12
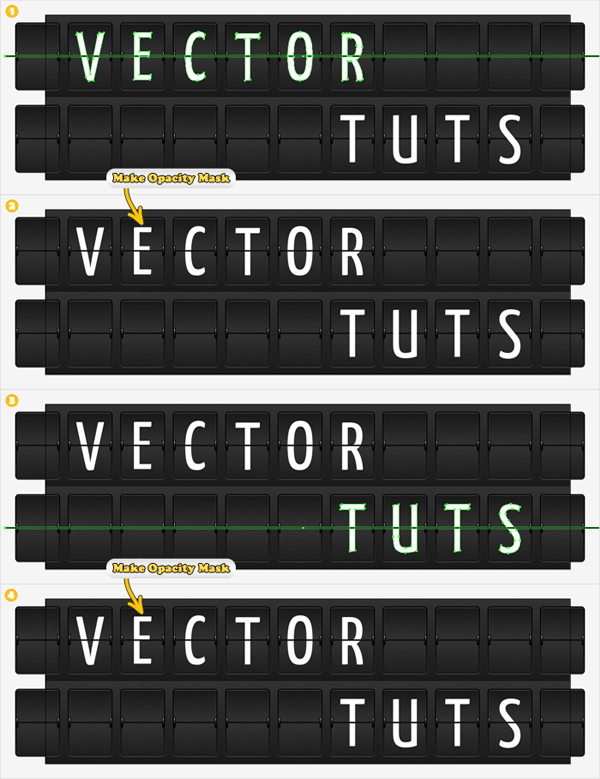
Disable the Smart Guides and enable the Snap to Grid. Go to Edit > Preferences > Guides & Grids then enter "2" in the "Gridline Every:" box. Select the Rectangle Tool and create a thin rectangle (2px height) along the middle of the top row. Fill this shape with black. Select this rectangle along with the top group of letters. Open the flyout menu from the Transparency panel, click on the Make Opacity Mask option then uncheck the Clip box. Reselect the Rectangle Tool(M) and create another thin, black shape. This time, along the middle of the bottom row. Select it along with bottom group of letters then click on the Make Opacity Mask option and uncheck the Clip box.
Conclusion
There you have it, a simple way to make typography that looks like an airport timetable. I hope you’ve enjoyed this tut.


