

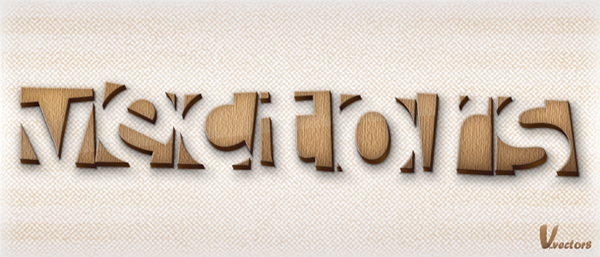
Final Product What You’ll Be Creating
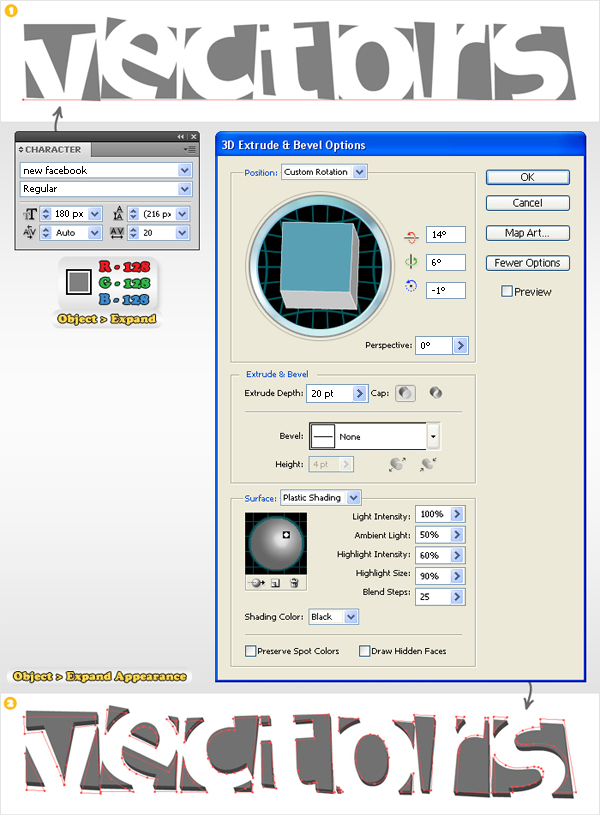
Step 1
Create a 700 by 300px document. Select the Type Tool (T) and add your text. I’ve used the New Facebook font, but you can use any font you like. Fill your text with the color shown below (R=128 G=128 B=128). Expand the text. Select the resulting group of shapes, add the 3D > Extrude & Bevel effect then go to Object > Expand Appearance.
Step 2
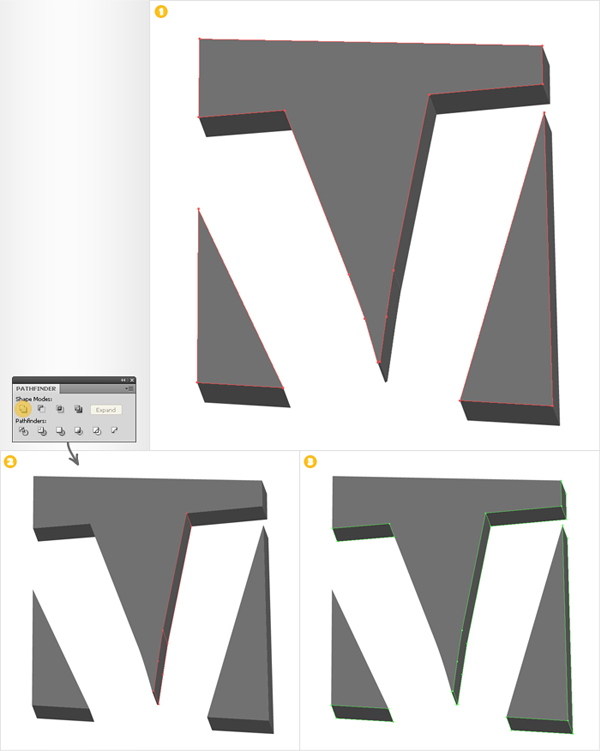
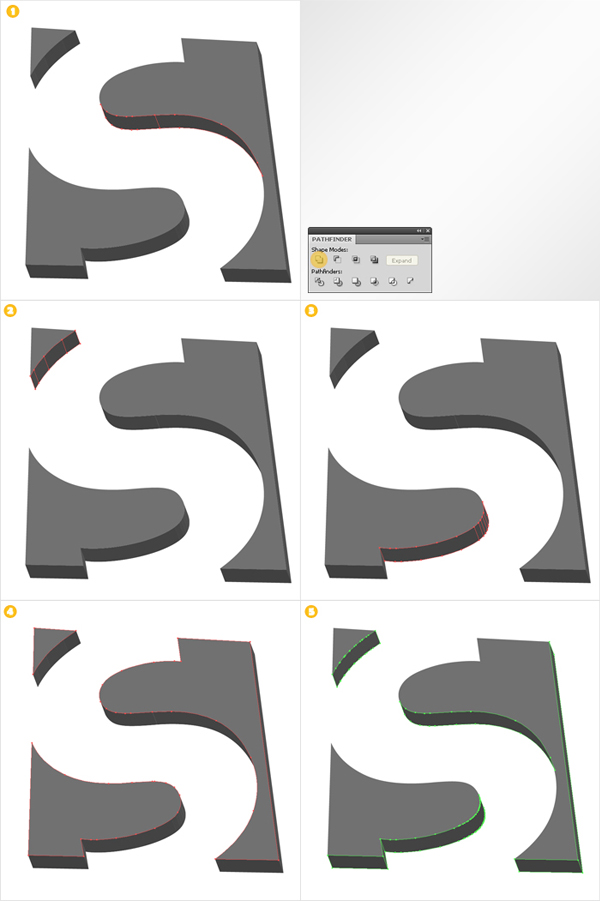
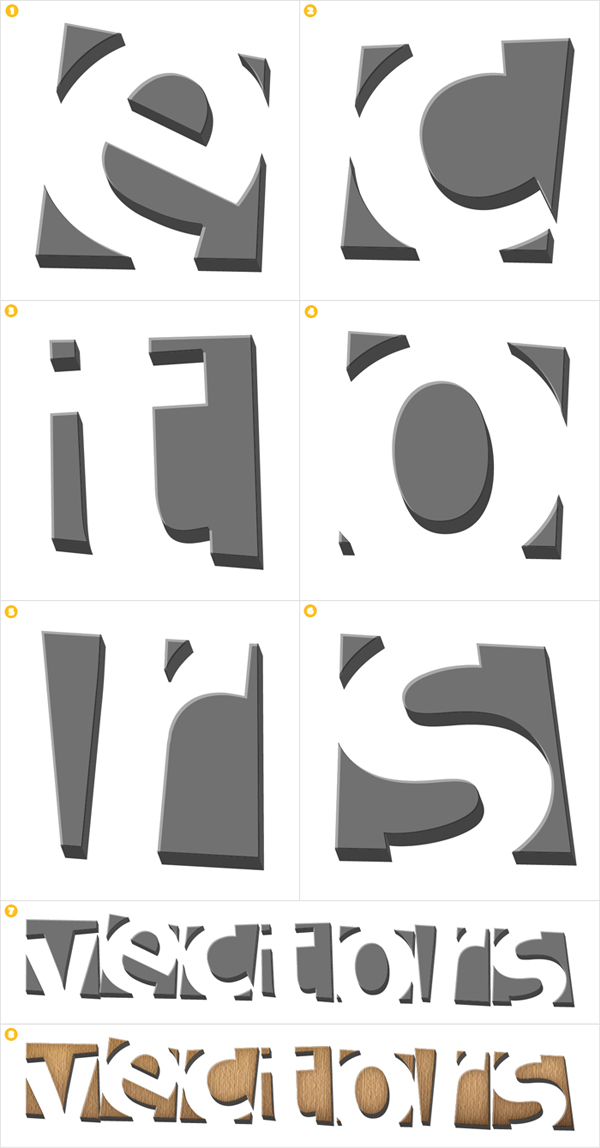
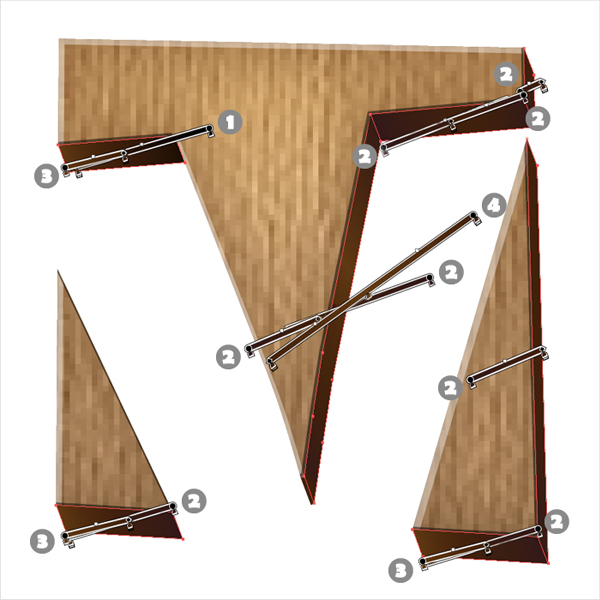
Now, you should have a selection of shapes and groups. You need to organize these before moving on to the next step. For starters, let’s focus on the "V". Select the top shapes (the ones filled with a lighter shade of gray), press Control + Shift + G to un-group each shape separately then press Control + G to group them together.
Select the shapes shown in image #2 and click on the Unite button from the Pathfinder panel. Un-group the rest of the shapes (filled with a darker shade of gray) then group them together (image #3).
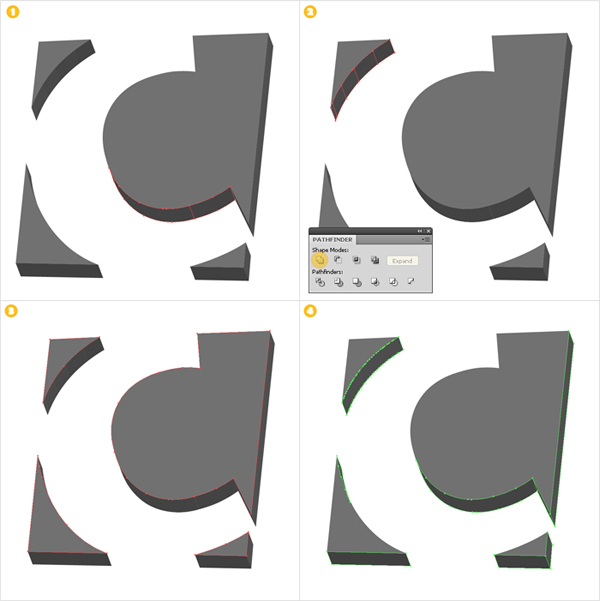
Step 3
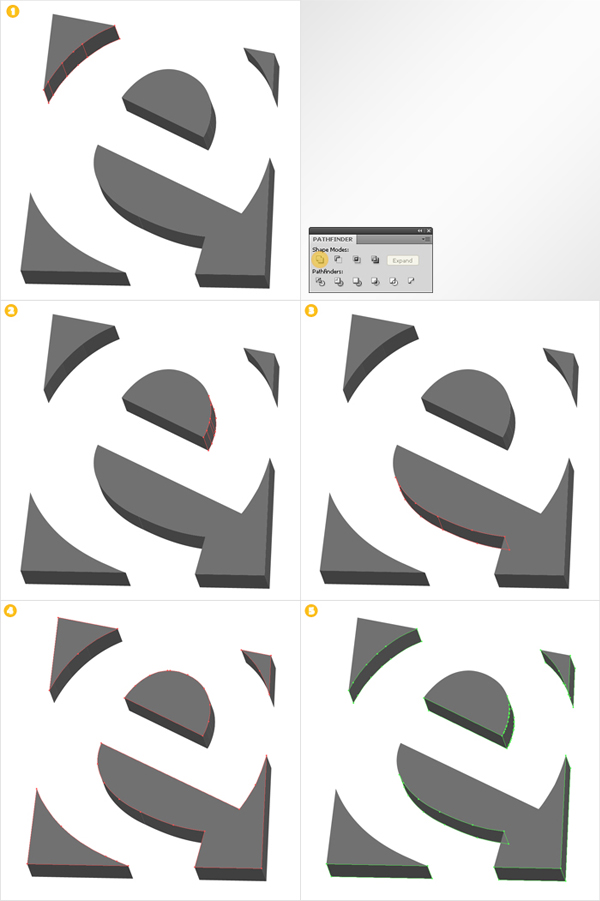
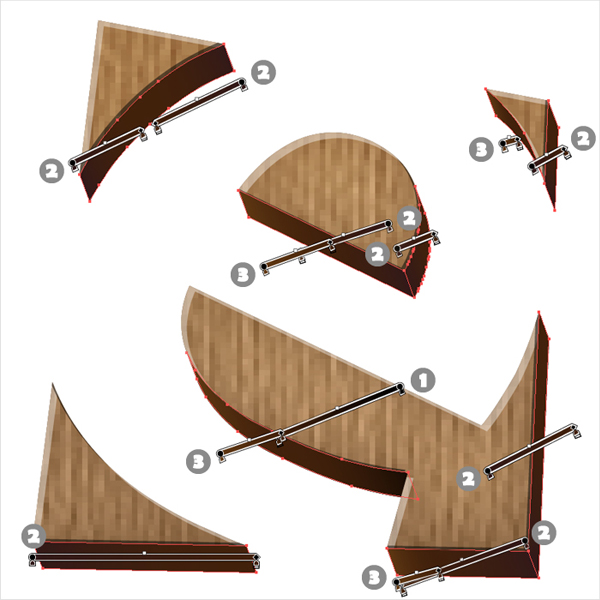
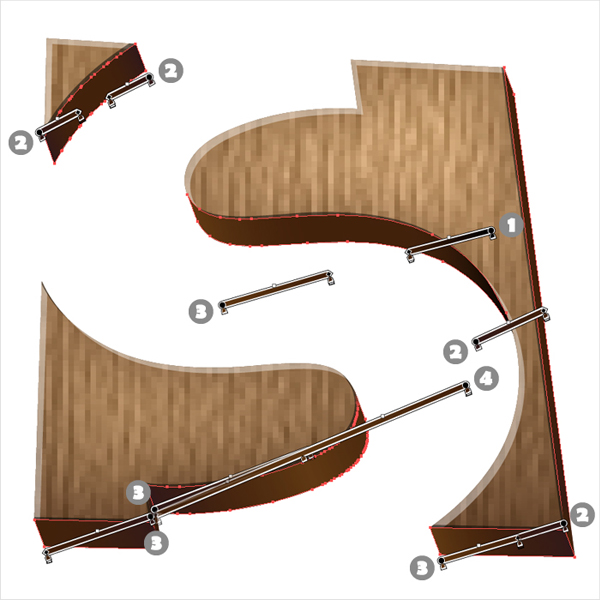
Let’s continue with the "e". Use the Unite button from the Pathfinder panel to connect the groups of shapes selected in images #1, #2 and #3. In the end, you must have two groups. One with the dark shapes (image #5) and one with the lighter shapes (image #4).
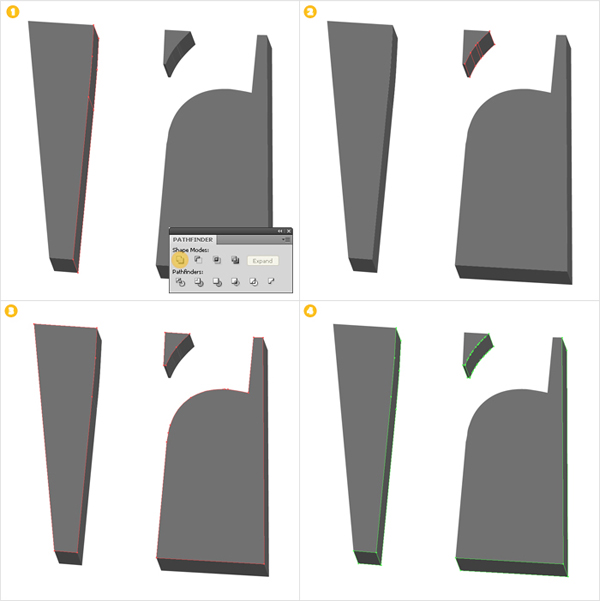
Step 4
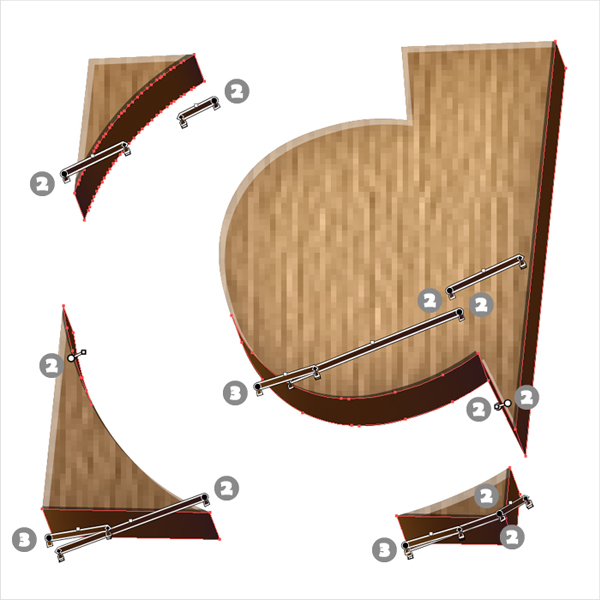
Next, is the "C". Again, unite the shapes selected in images #1 and #2 then make the two groups.
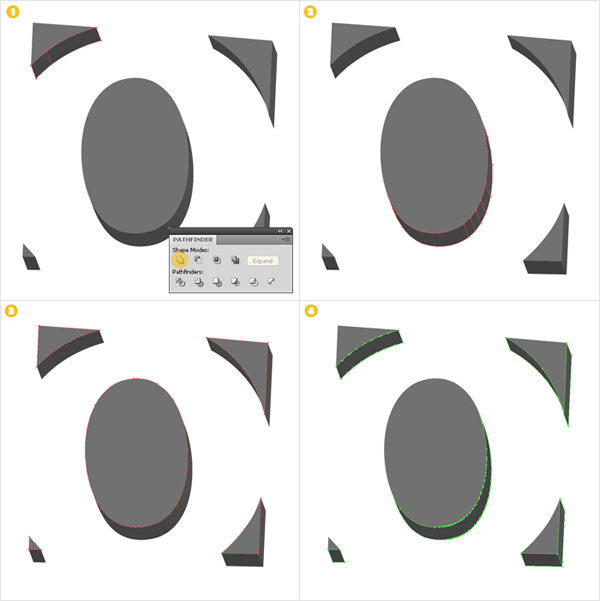
Step 5
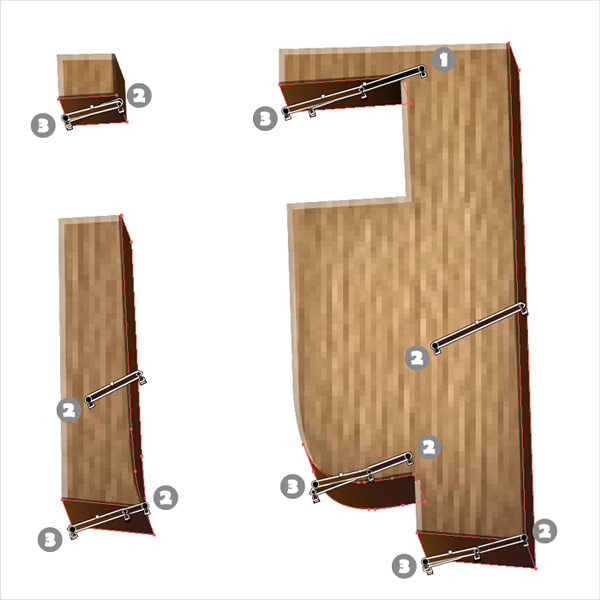
Now, the "T". Unite the shapes selected in images #1 and #2 then create the groups.
Step 6
Unite the shapes shown in images #1 and #2 then make the two groups.
Step 7
Once again, use the Unite button for the shapes selected in images #1 and #2 then make the two groups.
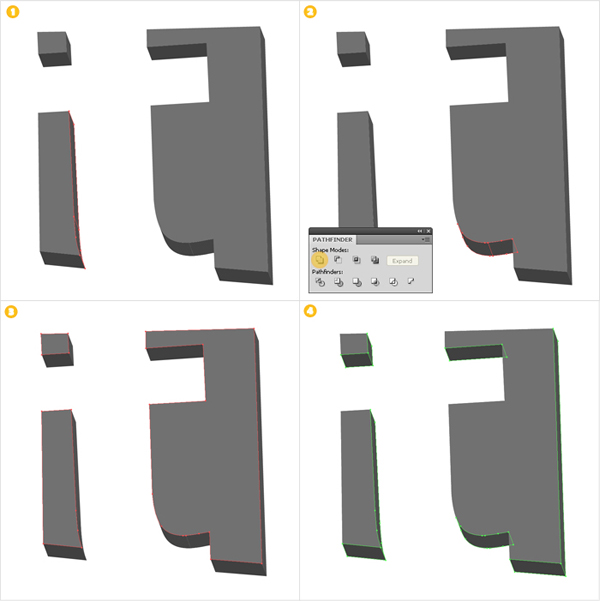
Step 8
Once last time, unite the shapes shown in images #1, #2 and #3 then make the groups.
Step 9
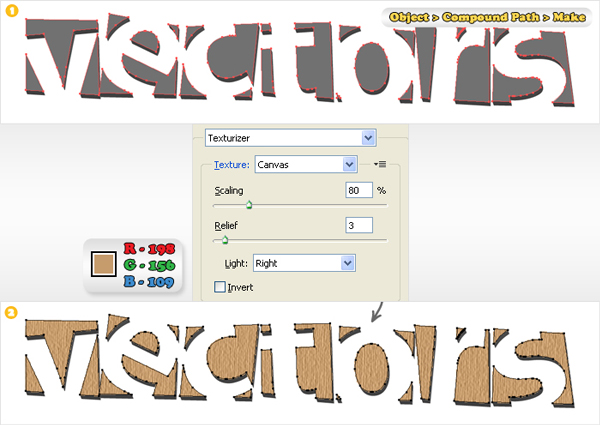
Duplicate all the top shapes (the ones filled with a lighter shade of grey). Select the copies and go to Object > Compound Path > Make then name the resulting shape "vvv". You’ll need this shape in several future steps, so make sure that you always have a copy.
Select a "vvv" copy, fill it with R=198 G=156 B=109 then add the Texturizer effect (Effect > Texture > Texturizer).
Step 10
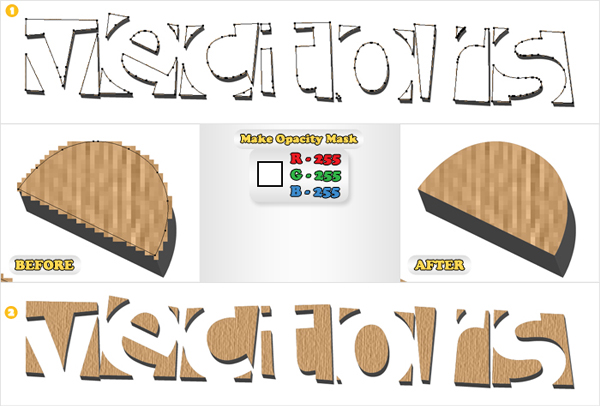
Next, you need to get rid of the pixelated edges. Open the Transparency palette. Select a "vvv" copy, fill it with white and move it above the texturized shape. Now, select both shapes, go to the fly-out menu of the Transparency panel and click on Make Opacity Mask.
Step 11
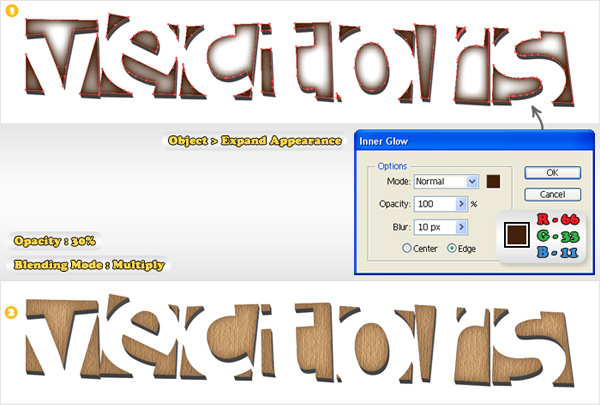
Select a new "vvv" copy and bring it to the front (Shift + Control + Right Square Bracket). Fill it with white, add the Inner Glow then go to Object > Expand Appearance. Keep only the expanded Inner Glow (delete the other shape). Change its blending mode to Multiply and lower its opacity to 30%.
Step 12
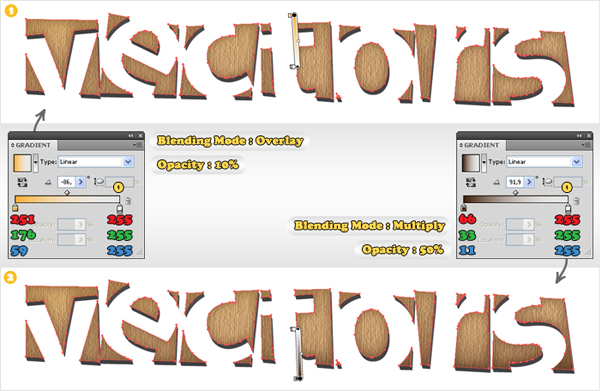
Create a new "vvv" copy and bring it to the front (Shift + Control + Right Square Bracket). Fill it with the left linear gradient then add a new fill (from the fly-out menu of the Appearance panel) and use the right linear gradient.
Select the first fill (from the Appearance panel), change its blending mode to Overlay and lower its opacity to 10%. Select the second gradient, change its blending mode to Multiply and lower its opacity to 50%. Select the shapes made in steps #9, #10, #11 and #12 and group them. Name it "Wood" and make it invisible (for the moment).
Step 13
Next, you’ll need to create a series of thin shapes along the edge of the top shapes. First, go to Edit > Preferences > General and enter a 0.5px Keyboard Increment.
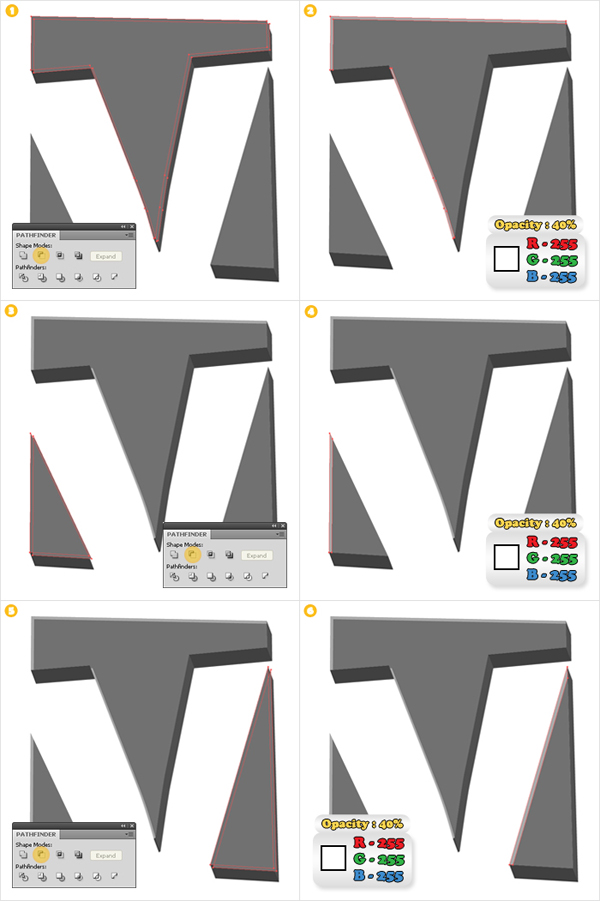
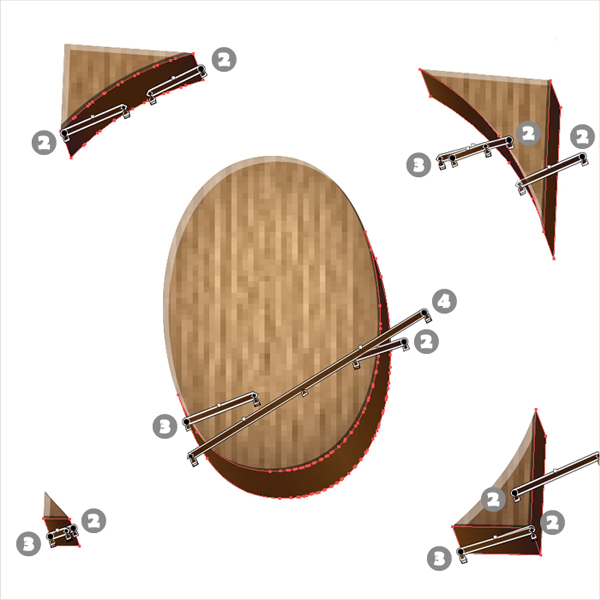
Now, let’s focus on the "V" shapes. Select the shape shown in image #1 and make two copies. Select the top one then press the down arrow and the right arrow twice (to move it 1px to the right and 1px down). Reselect the two copies and click on the Minus Front button from the Pathfinder panel. Fill the resulting shapes with white and lower their opacity to 40%. Repeat the same techniques for the other two shapes (image #3 and image #5).
Step 14
Duplicate the shape highlighted in image #1. Select the top one and press the left arrow and up arrow once (to move it 0,5px up and 0,5px to the left). Reselect both copies and click on the Minus Front button from the Pathfinder panel. Fill the resulting shapes with black and lower their opacity to 50%. Repeat the same techniques for the other two shapes (image #3 and image #5).
Step 15
Repeat the same techniques for the rest of the top shapes. Select all these thin shapes and group them. Bring this new group to the front (Shift + Control + Right Square Bracket). Turn "Wood" back to visible then lock both groups.
Step 16
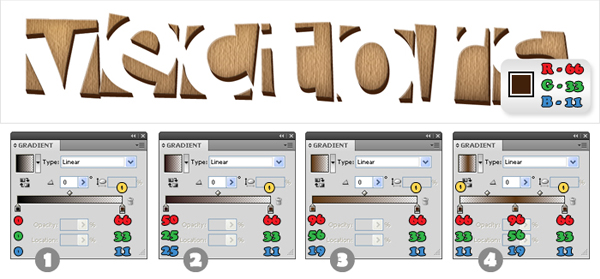
Now, let’s focus on the darker shapes. First, fill them all with R=66 G=33 B=11. Next, create the four gradients and save them in the Swatches panel. Simply name them "1", "2", "3" and "4". You’ll need them in the next step.
Step 17
Now, you need to add some new fills for most of these shapes. Take a look at the images to understand exactly how many and which are the gradients that you need to use for each fill.

Step 18
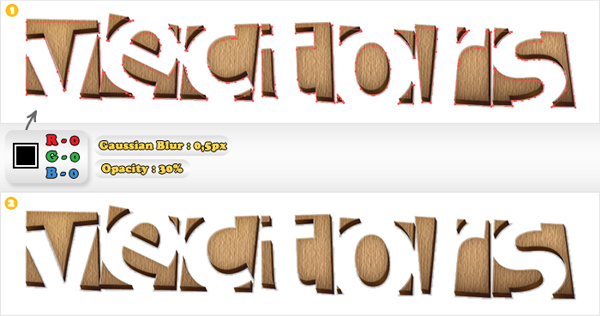
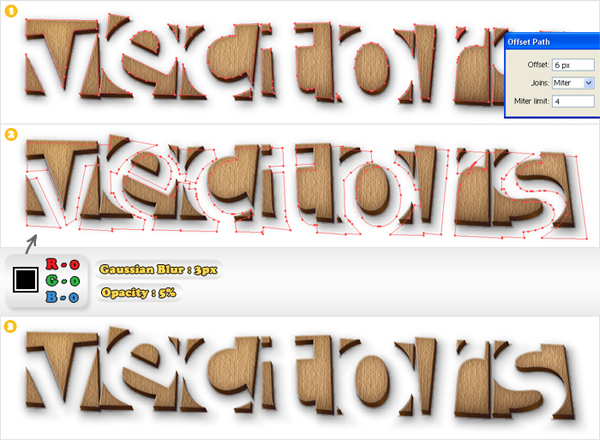
Next, is the shadow. Select a copy of "vvv" and go to Object > Path > Offset Path. Enter a 1px Offset and press OK. Select the resulting shape, send it to the back (Shift + Control + Left Square Bracket) and move it a few pixels down and to the right. Fill it with black, add a 0,5 Gaussian Blur and lower its opacity to 30%.
Step 19
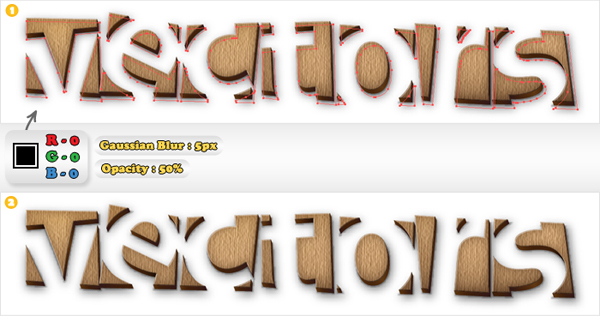
Duplicate the shape made in the previous step. Select this copy, move it below the original and make it a little bigger (simply resize it). Leave it black but raise the Gaussian Blur to 5px and the opacity to 50%.
Step 20
Select another "vvv" copy and go to Object > Path > Offset Path. Enter a 6px offset and click OK. Select the resulting shape, send it to the back and move it a few pixels down and to the right. Fill it with black, add a 3px Gaussian Blur and lower its opacity to 5%.
Step 21
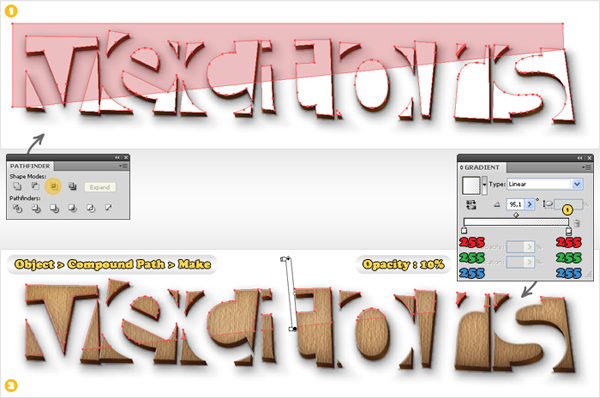
Select the Pen Tool (P) and create a shape like the red one shown in image #1. Select it along with the "vvv" shape (it’s the last time you need this shape) and click on the Intersect button from the Pathfinder panel. Select the resulting shapes and go to Object > Compound Path > Make. Bring the resulting shape to the front. Fill it with the linear gradient and lower its opacity to 10%.
Step 22
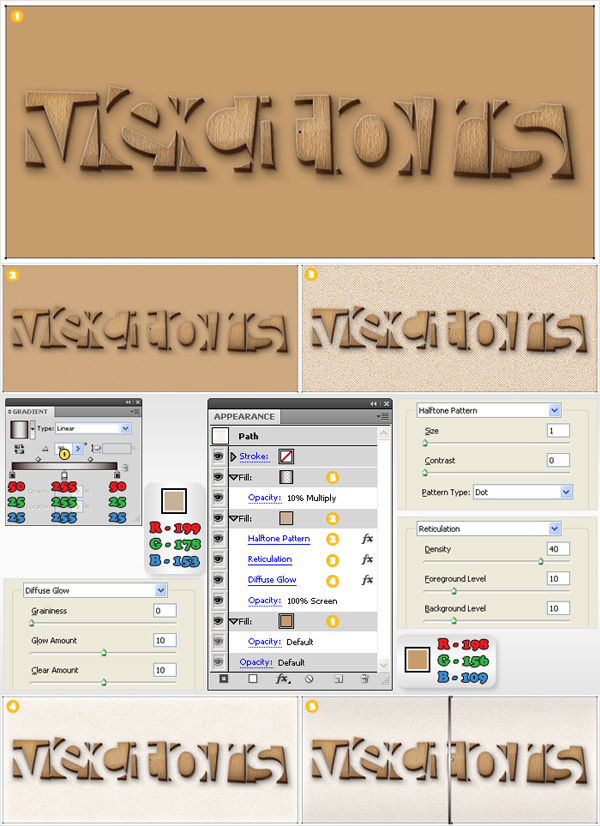
Finally, the background. Create a 600 x 300px rectangle, send it to back (Shift + Control + Left Square Bracket) and fill it with R=198 G=156 B=109. Add a new fill (from the fly-out menu of the Appearance panel), use the other color and change its blending mode to Screen.
Select this second fill (from the Appearance panel) then add the Halftone Pattern (Effect > Sketch > Halftone Pattern), the Reticulation (Effect > Sketch > Reticulation) and the Diffuse Glow (Effect > Distort > Diffuse Glow) effects (in this order).
Add a third fill and use the linear gradient. Select this final fill, change its blending mode to Multiply then lower its opacity to 10%.
Step 23
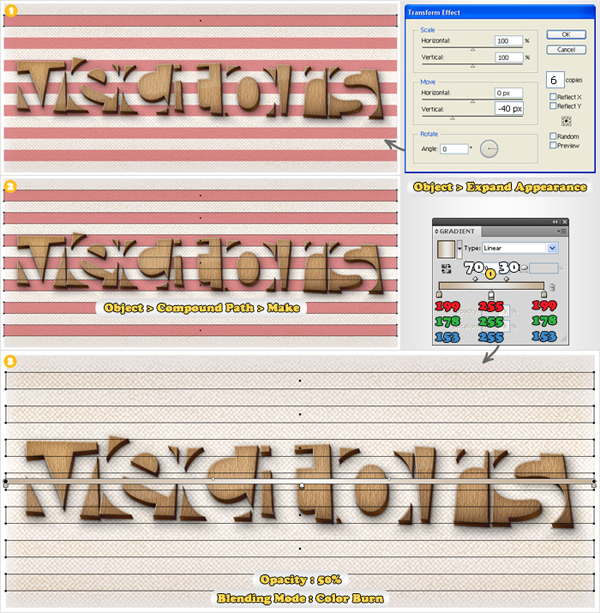
For a final effect select the Rectangle Tool (M). Create a 700 by 20px shape and place it in the top of your Artboard. Add the Transform effect (Effect > Distort & Transform > Transform) then go to Object > Expand Appearance. Select all seven rectangles and go to Object > Compound Path > Make. Fill the resulting shape with the linear gradient (pay attention at the slider Location), change its blending mode to Color Burn and lower its opacity to 50%.
Conclusion
There you have it, a wooden text effect. You can use the steps in this tutorial to make your own custom headings for web designs, or even to create some wood style icon sets. Use your imagination and the skills learned and you’ll be surprised by what you can come up with.