

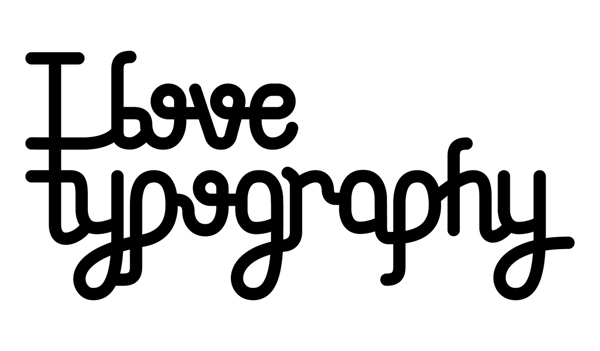
Final Product What You’ll Be Creating
Step 1
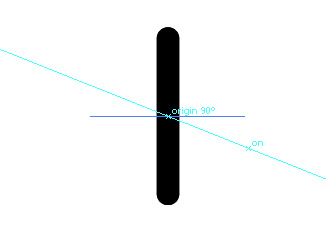
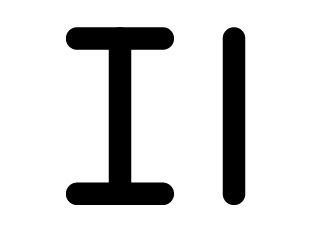
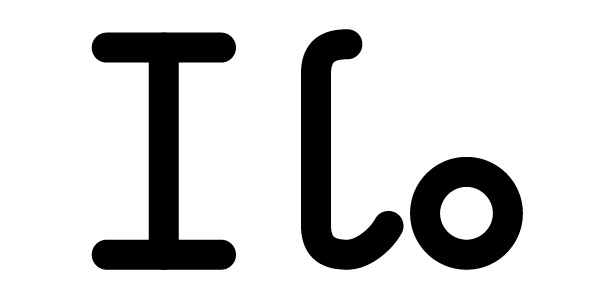
Start by creating a simple line, which will become a capital letter “i.” Deciding the size and weight of your writing is a trial and error matter. I’ve decided on a stroke weight of 45, but you may need to adjust your own along the way.

Step 2
Duplicate the line (Command + C, Command + F) and go to Object > Transform > Rotate, and rotate it by 90 degrees. Alternatively, you can use the Rotate Tool (R) and drag it to a horizontal position by holding Option.
Step 3
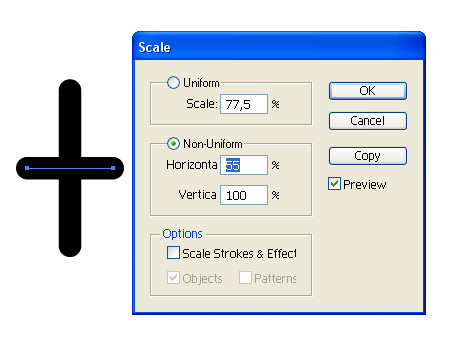
We duplicated the vertical line in order to form the top and bottom bracket of the letter “i.” Now go to Object > Transform > Scale and shrink the Horizontal size to 55%.
Step 4
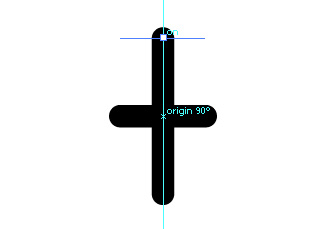
Make sure you have Smart Guides and Snapping enabled. These can be found in the View tab. Hold the mouse over the intersecting point (of the horizontal and vertical backed, while keeping the horizontal one on top of the other) and drag the horizontal bracket until it snaps to the end point of the vertical one. You may lock the movement to a straight angle by holding down Option after you’ve started dragging.
Step 5
Duplicate the top bracket and place one on the bottom as well. Now duplicate the horizontal one as well and move it. This will be the letter “l.”
Step 6
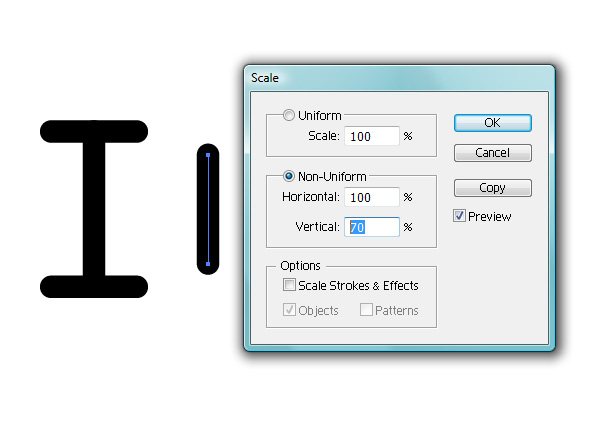
Reduce the vertical size of this line to 70% of its original size.
Step 7
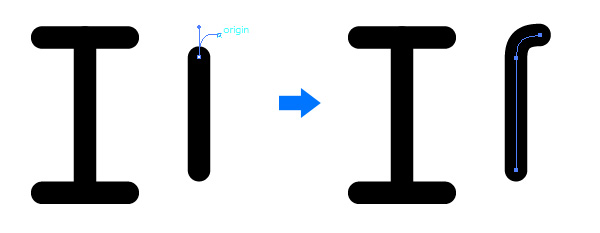
We’re using geometric methods as a starting point, but you’re going to need to grab the pen tool (P) and draw the top with it. While hovering over the top anchor point of the line, drag a handle while holding Option. Then place the second anchor point somewhere near a 90 degree angle. You can edit the anchors and handles with the Direct Selection Tool (A) if you’re not happy with how it looks.
Step 8
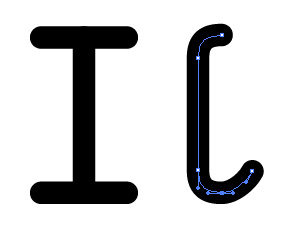
Trace the bottom half just as you did with the top, but this time with an additional anchor point.
Step 9
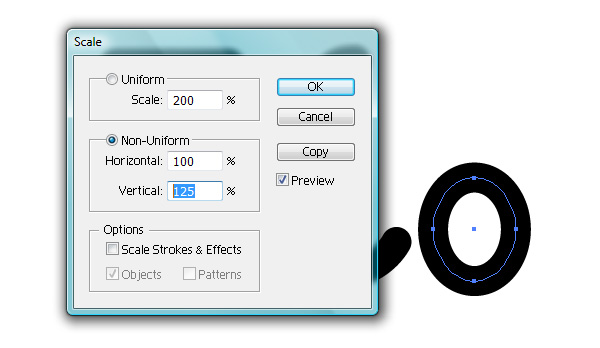
The “o” letter is obviously a simple circle path with a stroke. Again, the size and proportion is something you may want to experiment with and adjust later, so keep a copy somewhere outside the active area.
Step 10
Use the Scale Tool again and change its Vertical proportion to 125%.
Step 11
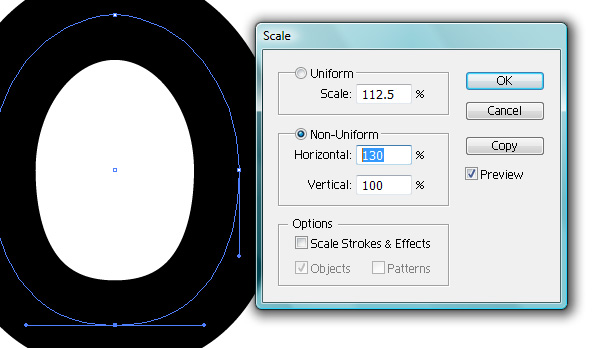
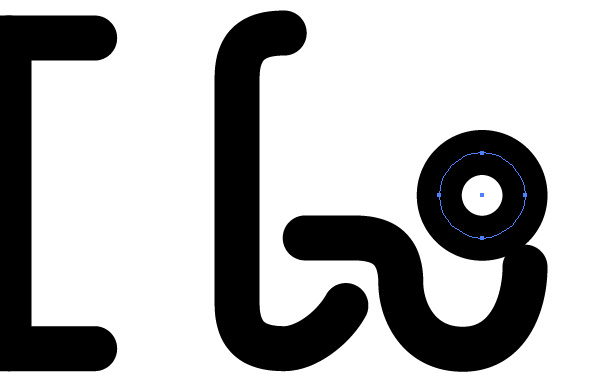
Use the Direct Selection Tool (A) to select just the bottom anchor. Change the Horizontal size of this endpoint to 130%.
Step 12
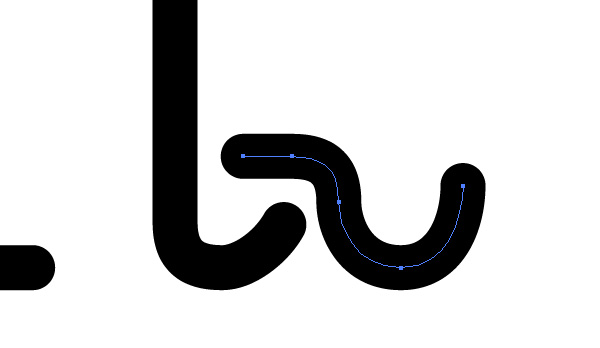
Using the Smart Guides, drag the entire ring from the bottom anchor, hover over the bottom anchor of the letter “l,” then slide it horizontally near its initial position. By doing this, you’re lowering the ring to the same baseline of the letter “l.”

Step 13
Lower the left anchor, and create a bracket that hides underneath the “l.” Be sure to make a connector that isn’t too sharp (hence the lowering of the left anchor
Step 14
Create a new circle with the Ellipse Tool (L). Make sure you keep a duplicate as a backup; we’ll need it later. How far up you place it from the position of the bottom ring decides the x-height of your font.
Step 15
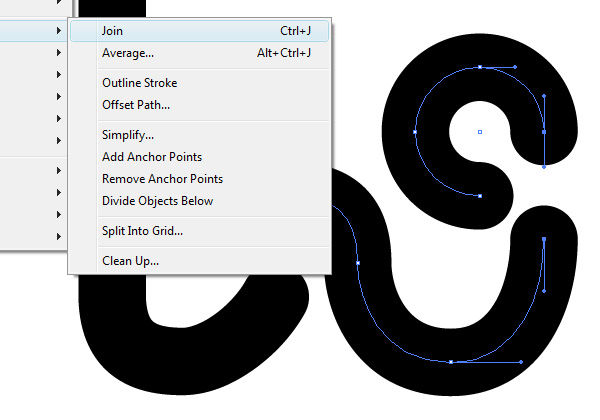
With the Direct Selection Tool (A), delete the lower right corner of the circle. Then join the right anchor with the top of the bottom ring anchor by pressing Command + J.
Step 16
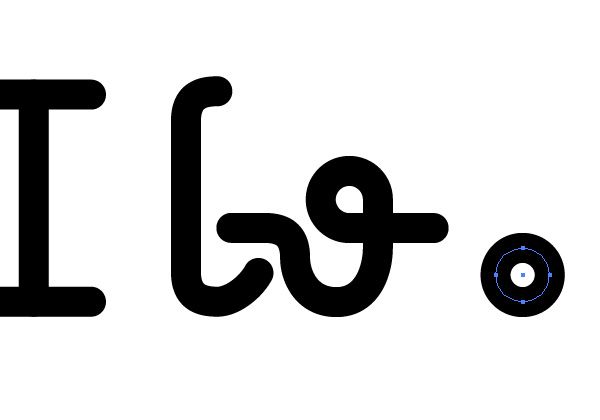
Remember the small circle I asked you to create a duplicate of? Make another copy (hold on the original still).
Step 17
Create a horizontal line and snap it to the center (also horizontal anchors) of the new small circle. You can easily do this with the Smart Guides and Snapping enabled by dragging the line on top of one of the anchors.
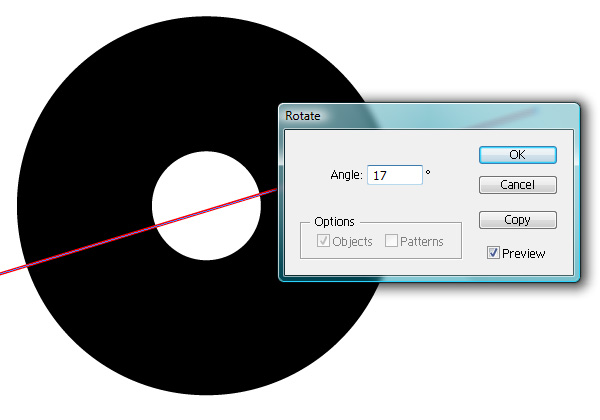
Step 18
Go to Object > Transform > Rotate and rotate it by 17 degrees.
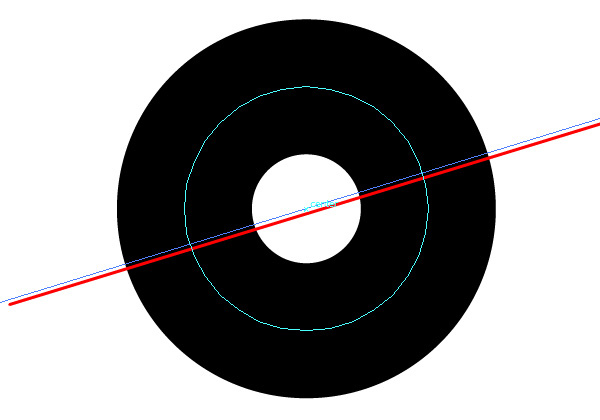
Step 19
Drag the line until it snaps to the center point of the circle.
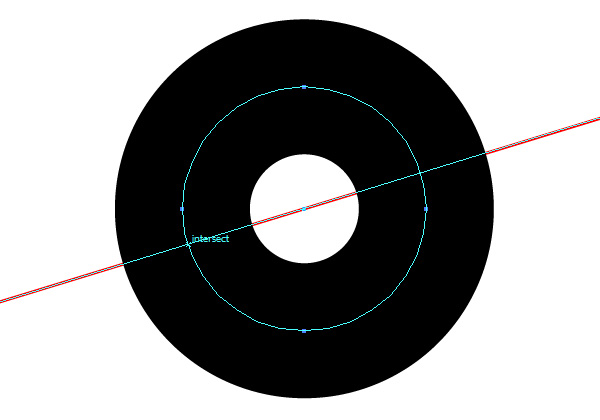
Step 20
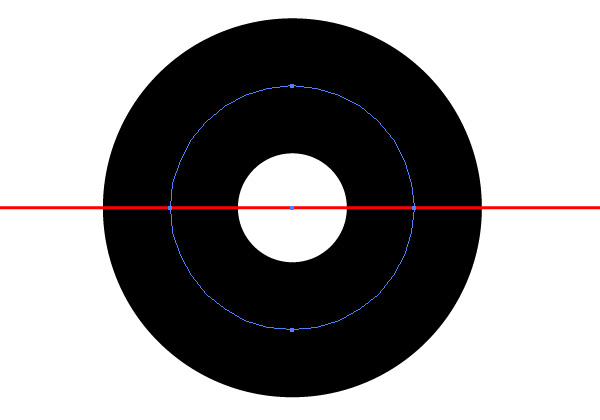
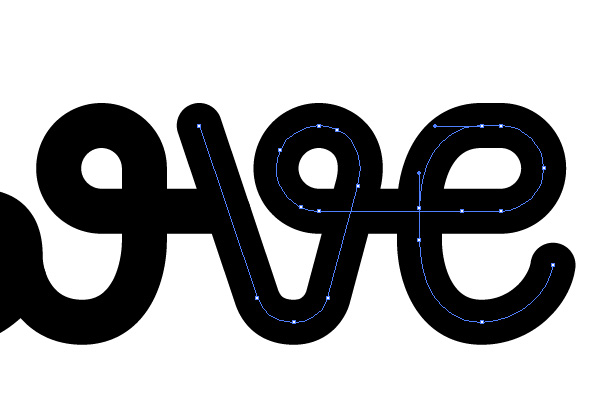
While having the line selected, go to Object > Arrange > Send to back. Then, select the circle. With the Pen Tool (P) active, add an anchor point where the red line intersects with the circle.
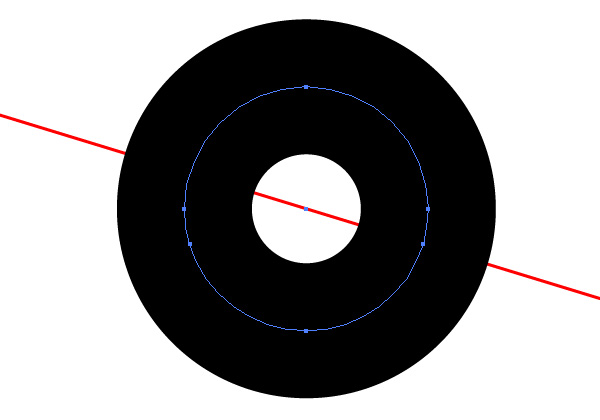
Step 21
Flip the line horizontally (Object > Transform > Reflect by Vertical Axis), snap the line to the center of the circle, select the circle and add another intersecting point.
Step 22
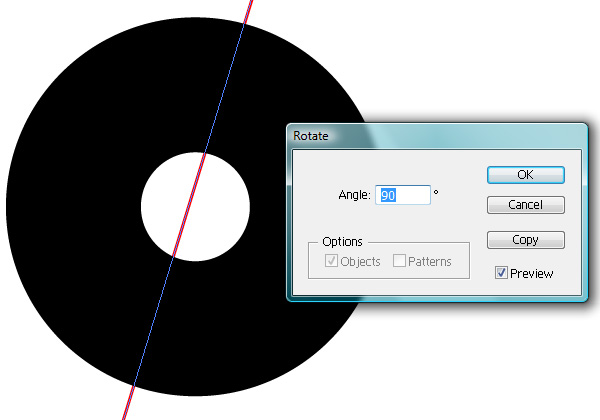
Go to Object > Transform > Rotate and rotate it by 90 degrees.
Step 23
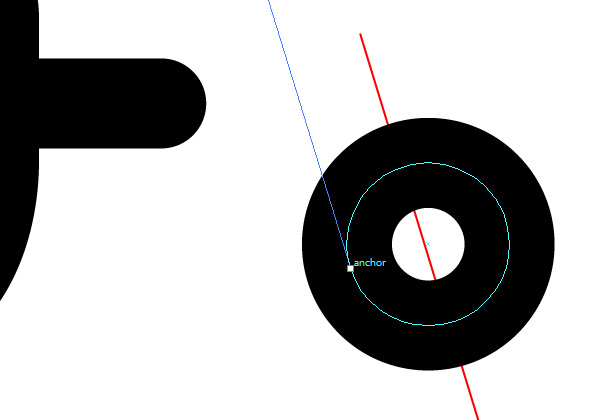
Drag the line from the bottom anchor and snap it to the left sided anchor of the circle.
Step 24
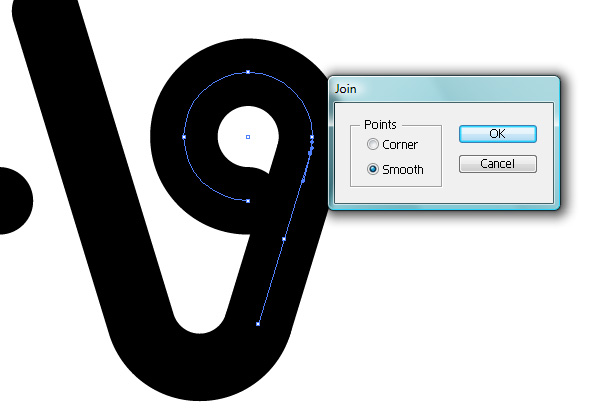
Using the Direct Selection Tool (A), delete the left, right and top of the anchors. Now drag the remaining anchor as to select the overlapping left anchor of the circle and bottom anchor of the line, and merge them by pressing Command + J and selecting Smooth.
Step 25
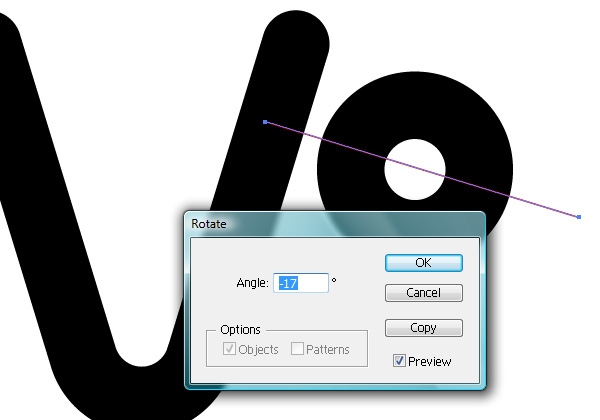
Make another copy of the small circle and another line and rotate the line by -17 degrees this time.
Step 26
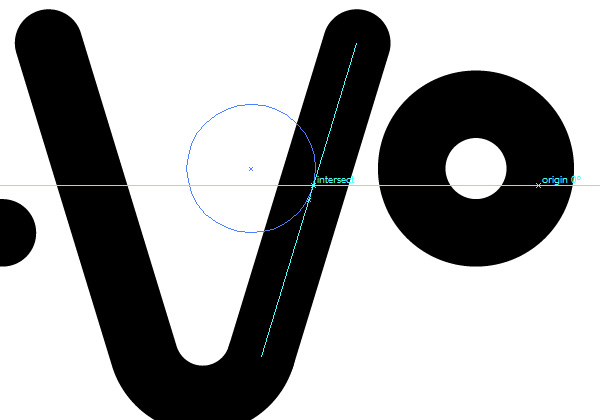
Add an intersecting point just like before, and drag the circle by the newly created anchor until it snaps to the line of the letter “v.”
Step 27
Delete the bottom anchor of the circle, and drag the top anchor from the letter “v” until it snaps to the circle’s -17 degree anchor point. Join these two overlapping points (Command + J).
Step 28
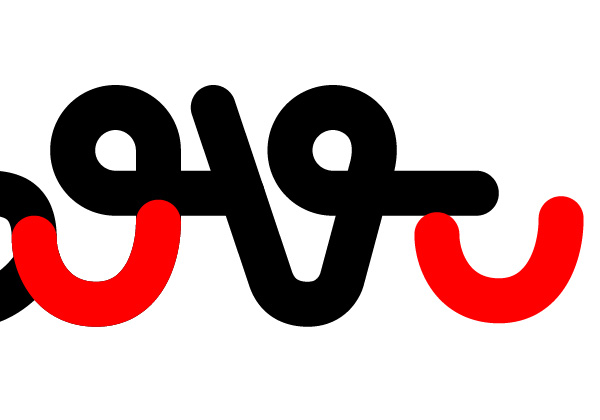
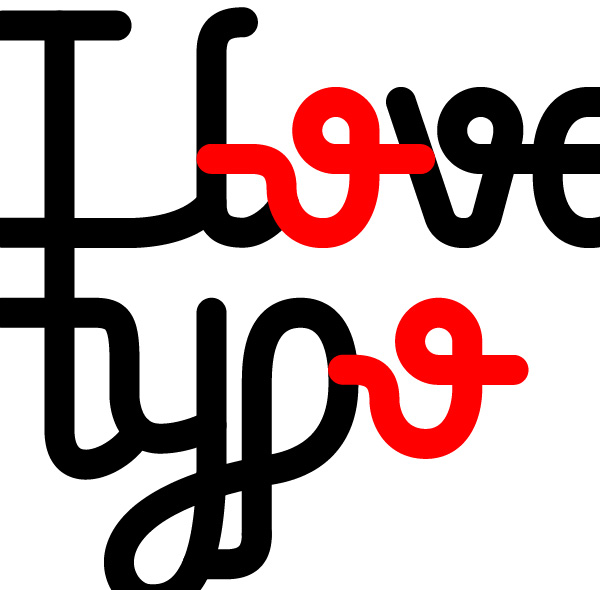
From now on, we’ll be able to use certain parts of a letter in multiple ways. I’ve highlighted them with red to show which portions to copy and paste. Duplicate the highlighted portion and place it as shown in the screenshot below.
Step 29
Using the Pen Tool, add an anchor a bit lower from the right-hand end point. Delete the top one with the Direct Selection Tool
Step 30
Duplicate the left side of the “o” ring and place it on the right side of the “e.”
Step 31
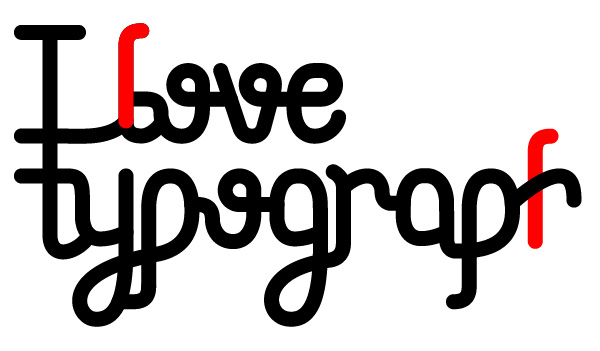
The top left corner you’ll have to create using the Pen Tool.
Step 32
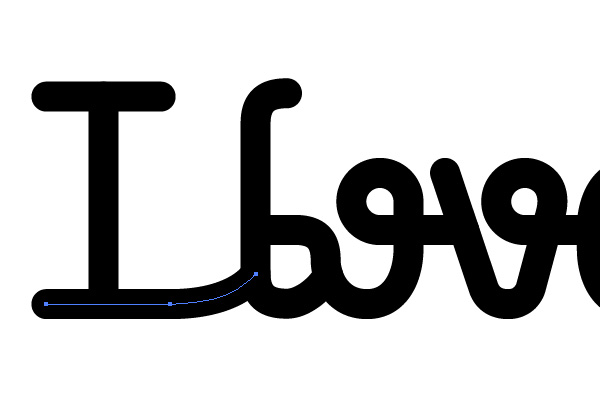
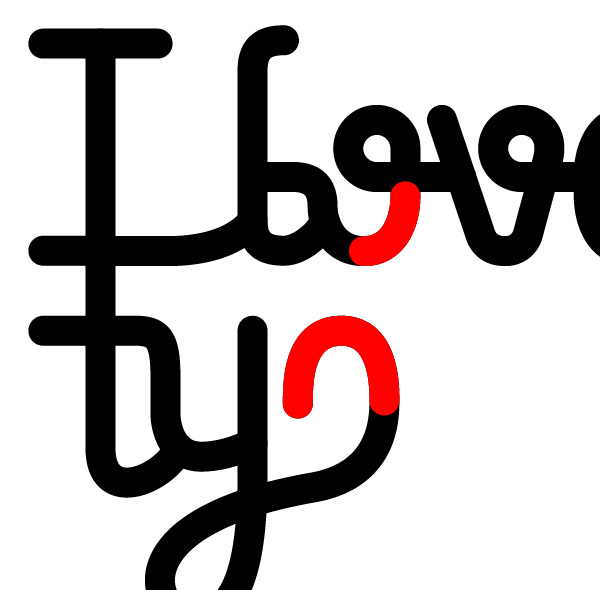
Modify the bottom line of the letter “i” so that it ties to the second word. You may need to play around with the space between it and the word “love,” but it will become more clear once you create the bottom half.
Step 33
Let’s start the second row and third word. The height of the letter “t” depends on how much spacing you want to leave between the two rows. This can be adjusted later, so for now use the length of the letter “i” and add a bit of spacing.
Step 34
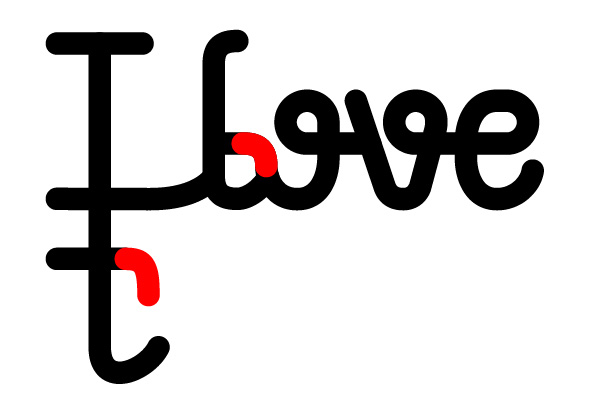
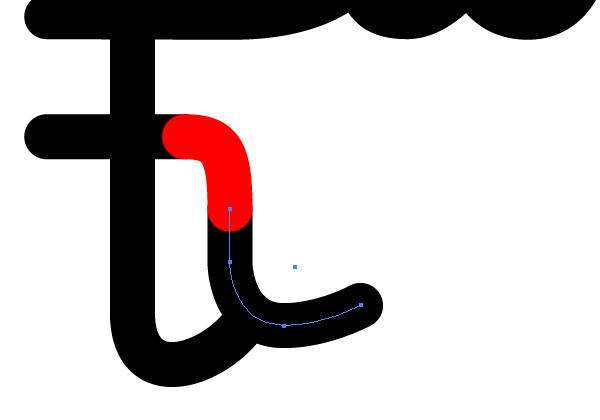
Let’s get started on the “y” now. At this point and in other situations you may have to modify the section just a bit. In this case, the bottom anchor has been lowered.
Step 35
Before tracing this portion of the letter, it’s good to decide a baseline for the rest of the word. The lowest anchor will be ours.
Step 36
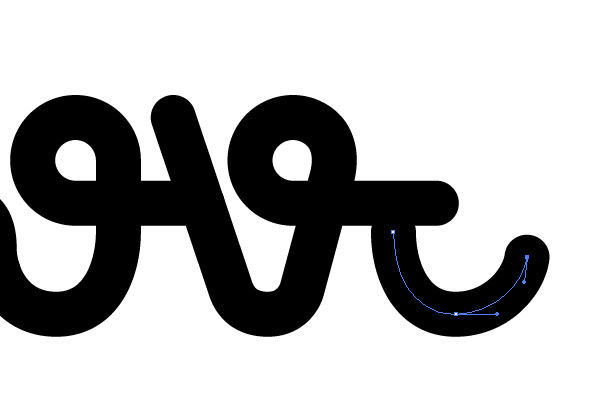
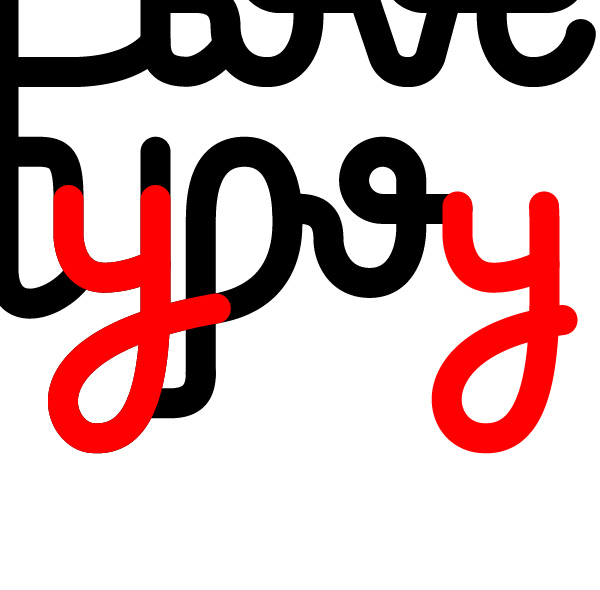
Stretching into the descender area is the rest of the letter “y.” Try doing this with as few anchors as possible. We’ll be using this part in other letters as well, and that will keep it easy to modify and adapt.
Step 37
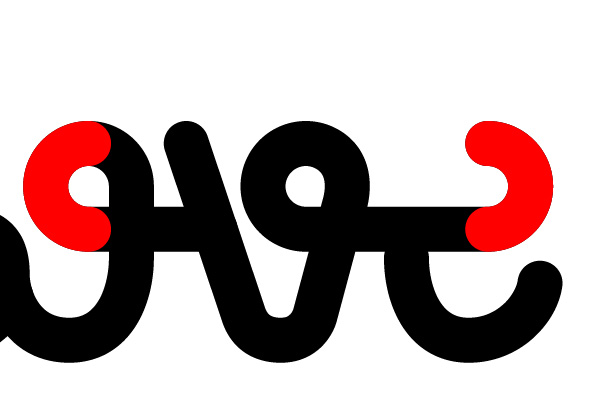
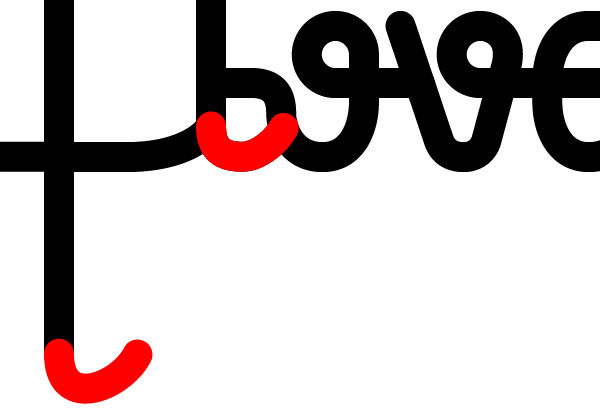
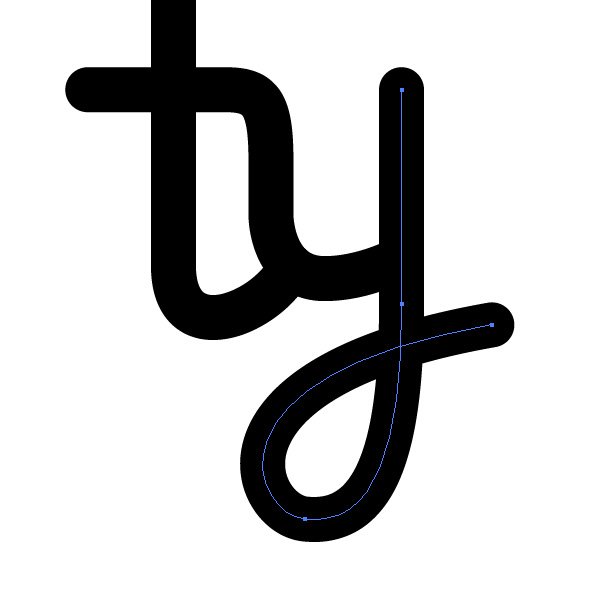
Continue the “y” loop into the “p.” I used a portion from the “o” to create the “p.” Once you’ve joined it with the “y,” duplicate it and flip it horizontally. That will give us a semicircle that we’ll use in a few other letters as well.
Step 38
Don’t forget to make the bracket of the “p” slide under the loop from the “y.” You can duplicate the highlighted section to achieve this.
Step 39
Since we created the “o” before, just duplicate it and place it as the next letter. Remember to align it to the baseline.
Step 40
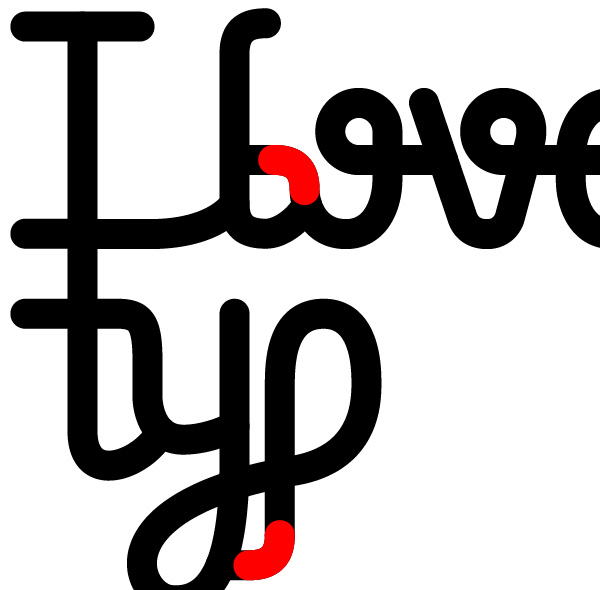
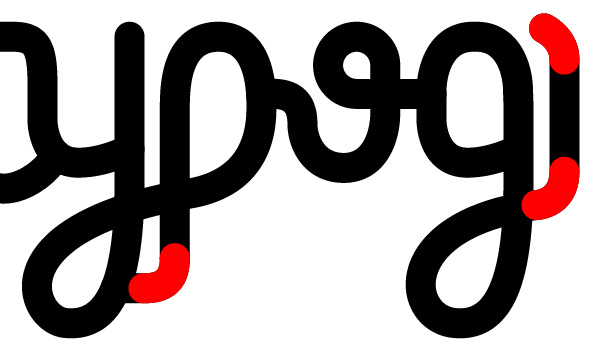
Part of the “g” can be found in the “y.” Duplicate it, and lower the top anchors similar to the screenshot below.
Step 41
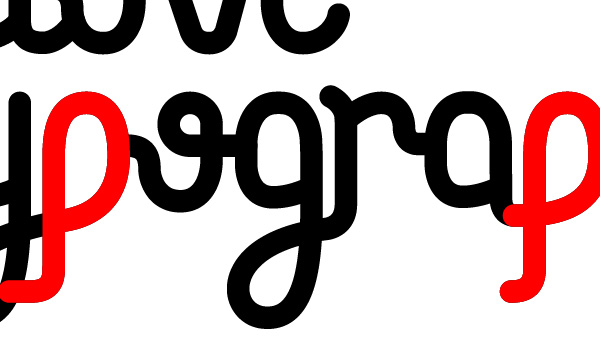
Finish off the bowl by duplicating the top from the “p.”

Step 42
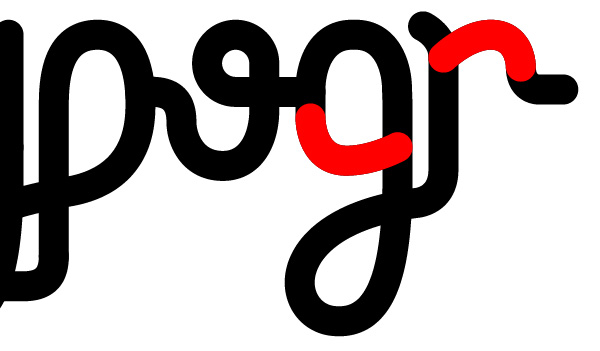
I used the end of the “p” in the “r,” but their anchors have been slightly modified.
Step 43
I initially went for a cursive letter “r,” but the large weight of the font made that too difficult to construct. As long as you keep the shoulder of the “r” not too low, it should be perceivable from a letter “n.”
Step 44
The “a” is another simple fix. duplicate the bowl from the letter “g.”
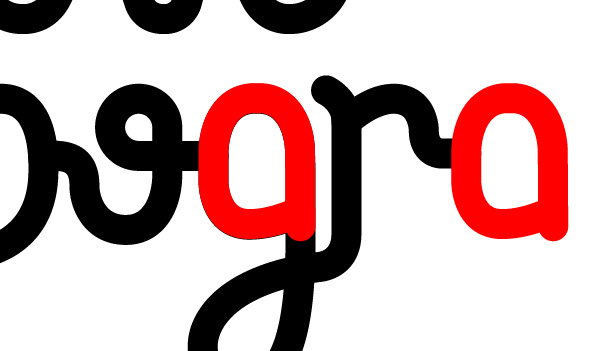
Step 45
Copy and paste the “p” in its proper position
Step 46
The shoulder of the “h” is another case where I used an already created portion but modified it. Move one side further out, but remember to increase the scale of the arch as well, otherwise it will look skewed.

Step 47
Complete the ‘h’ by reusing the “l.”
Step 48
And finally, add the letter “y” found near the beginning of the word.
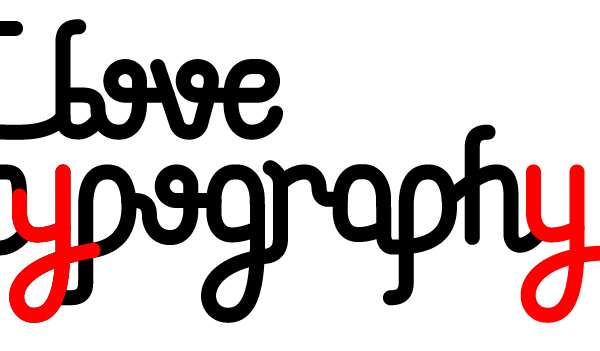
Final Image
That’s it for this part! Stick around for part 2, when we turn this endless string into a colorful type treatment.