

Final Product What You’ll Be Creating

Step 1
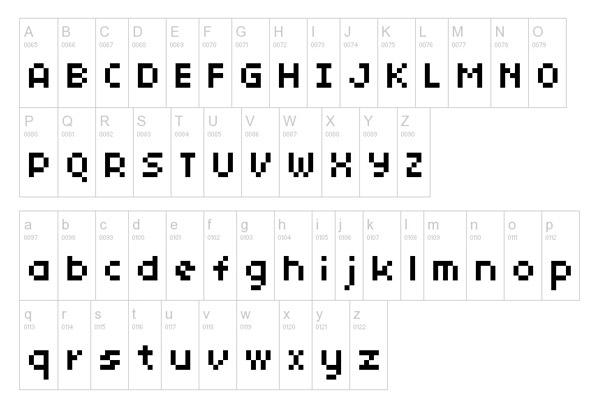
Download the 04b_03 font from Dafont and install it on your system.
Step 2
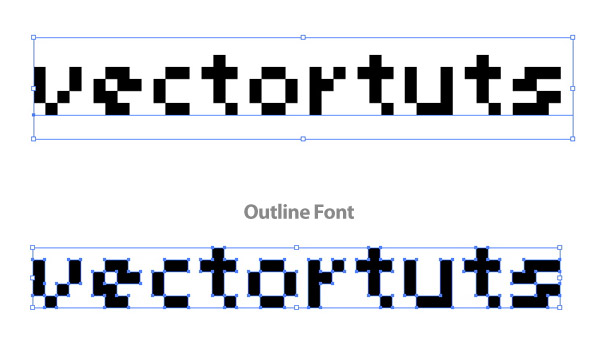
Create a new document and type out some text with the Text Tool (T) and apply the 04b_03 font. Once typed out, outline the text by going to Type > Create Outlines (Shift + Command + O).
Step 3
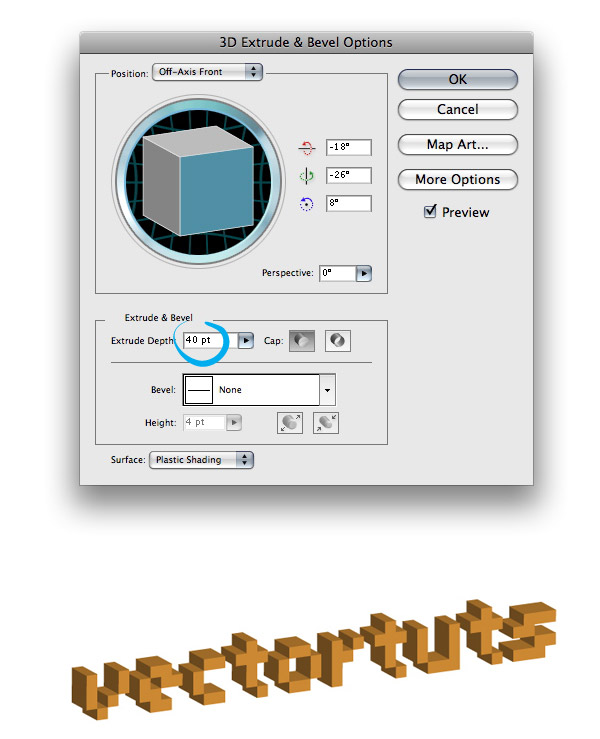
Change the color of the type to an orange so we can see the shading effect when we use the Extrude and Bevel Filter, but we will be changing the color later.

Step 4
With the outline text selected go to Filter > Effect > 3D > Extrude and Bevel to open up the 3D Extrude & Bevel Options dialog. Once in the dialog, keep the default measurements except the Extrude Depth. The default setting should go as follows: -18 for the Rotation around the X axis (red arrow), -26 for the Rotation around the Y axis (green arrow), 8 for the Rotation around the Z axis (blue arrow), 0 for perspective, and 50 for the Extrude Depth. Once the settings are set to the default, change the Extrude Depth to 40.
Step 5
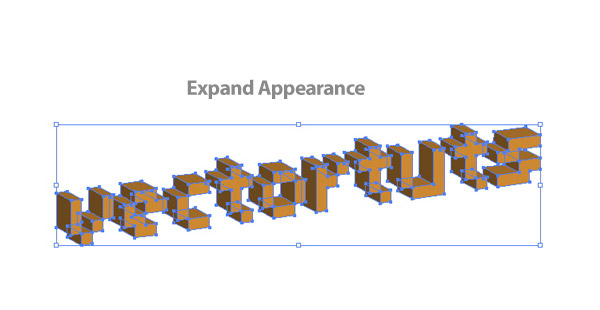
With the 3D text selected, go to Object > Expand Appearance.
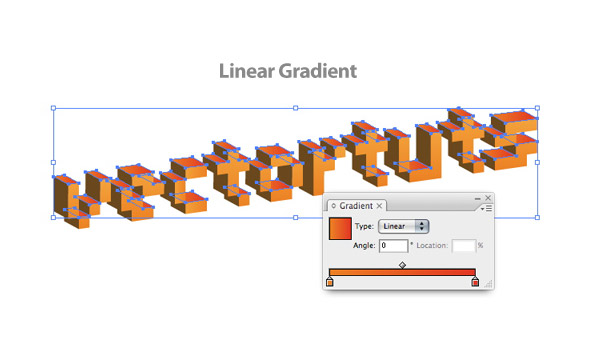
Step 6
Use you Magic Wand Tool (Y) and click on the lightest orange color. This will select all the objects containing the lightest color. Change the fill of the selected orange to a Linear Gradient from the Gradient Panel. Make the first swatch in the Gradient Slider an orange color and the second swatch a darker orange.
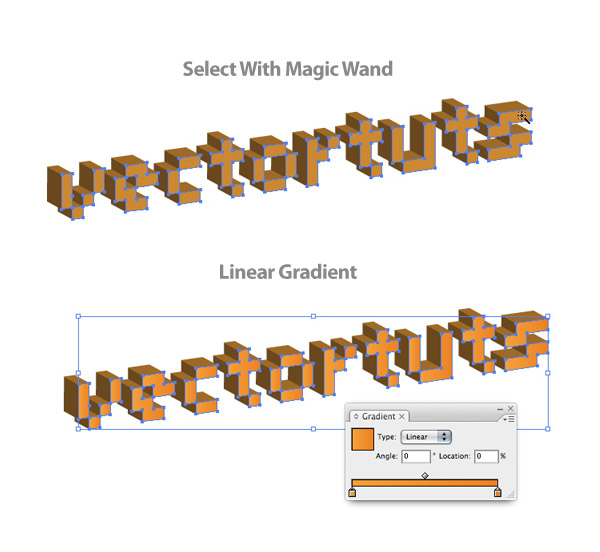
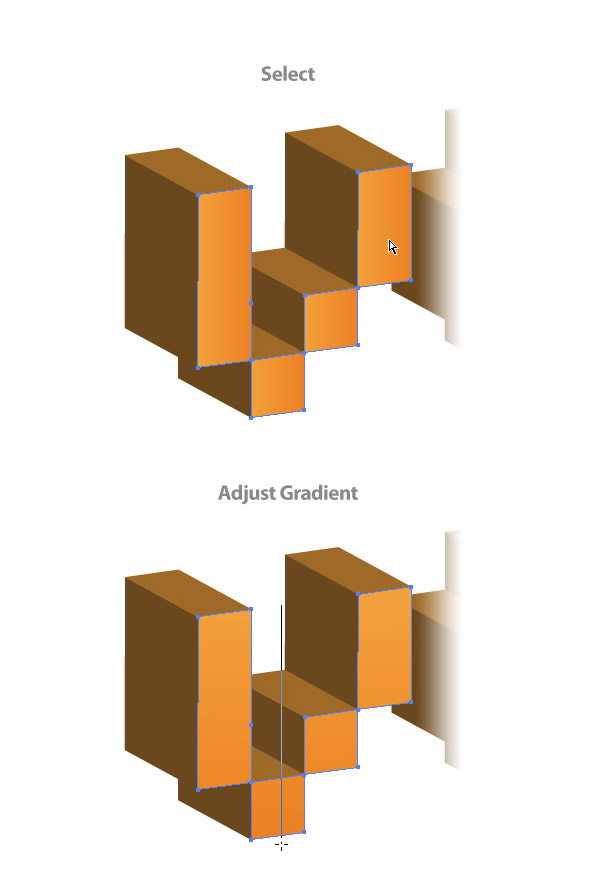
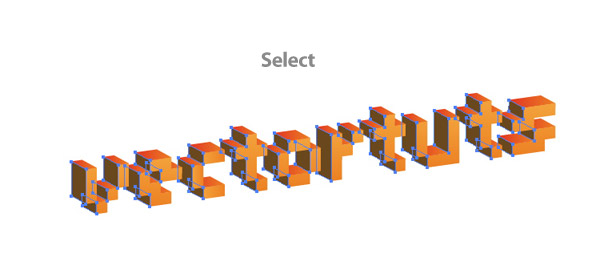
Step 7
Next we are going to adjust the gradient on each individual letter with the Gradient Tool (G). Start by select the shapes of the first letter with the Direct Selection Tool (A). If you use the Selection Tool (V), you will select all the text, we just want the to select the gradient in the first letter. With the Gradient Tool (G), click at the top of the letter and drag to the bottom of the letter, making the lighter orange at the top of the letter.
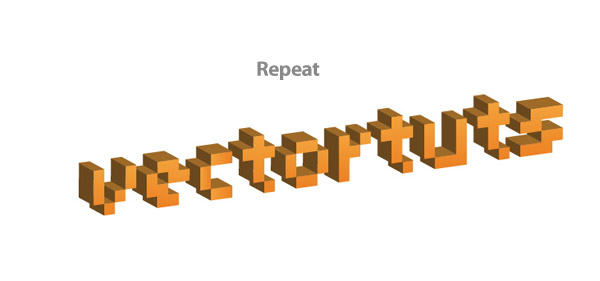
Step 8
Repeat the previous step to all the letters of your type.
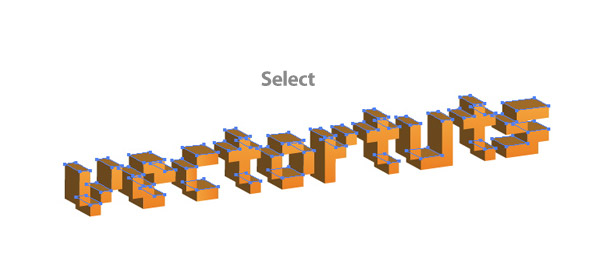
Step 9
Use your Magic Wand (Y) and select the the second lightest orange.
Step 10
Fill the selection with a Linear Gradient, and make sure the first swatch in the Gradient Slider is the dark orange from the previous gradient and the second swatch is a dark orange-red color.
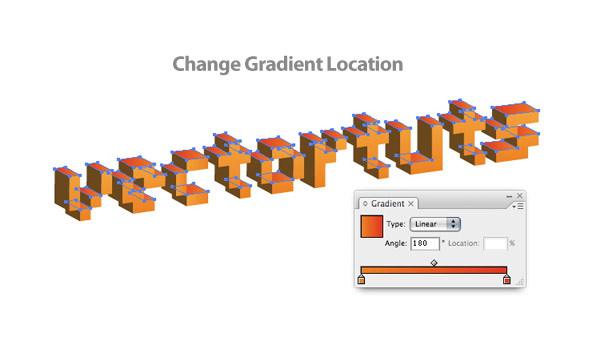
Step 11
With the new Linear Gradient still selected, change the Location in the Gradient Panel to 180 so the darkest part of the gradient is on the left side of the letters.
Step 12
Use the Magic Wand and select the last dark orange.
Step 13
Fill the selection with a Linear Gradient, and make sure the the first swatch in the Gradient Slider is the dark orange-red from the previous gradient and the second swatch is a darker orange red color.
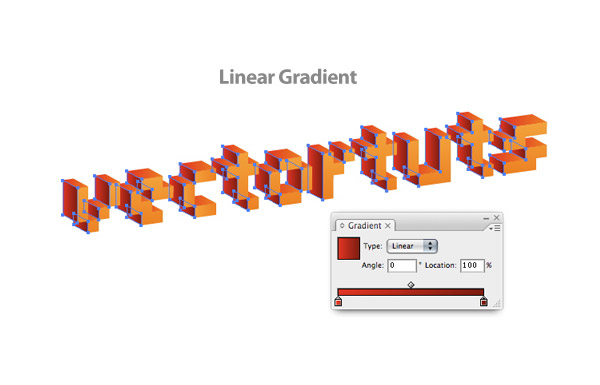
Step 14
With the new Linear Gradient still selected, change the Location in the Gradient Panel to 90 so the darkest part of the gradient is at the top side of the letters.
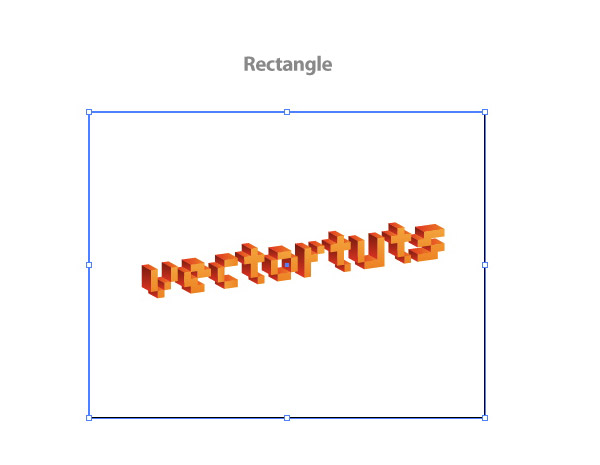
Step 15
Now that the type is done, we can start looking at the background. Create a rectangle with the Rectangle Tool (M) that is the size of your document and place ti behind all your other artwork.
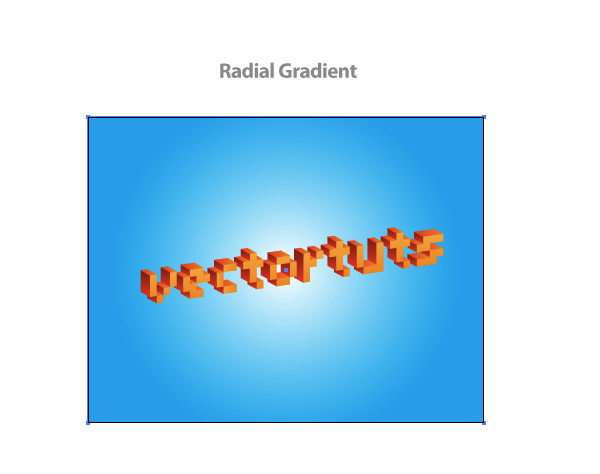
Step 16
Fill the rectangle with a Radial Gradient from the Gradient Panel, and change the first swatch in the Gradient Slider to a light cyan color and the second swatch to a cyan color.
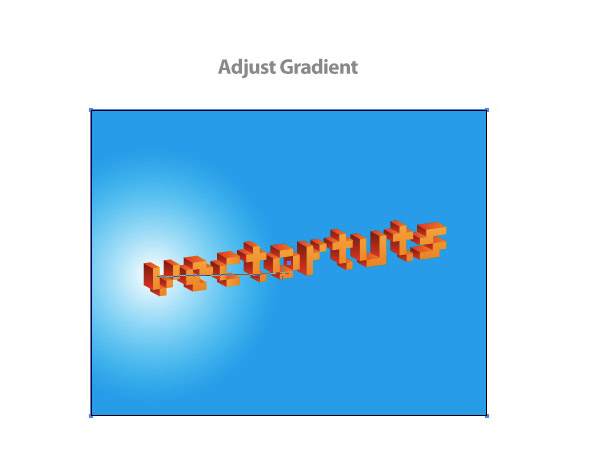
Step 17
With the Gradient Tool, adjust the Radial Gradient by clicking close to the first letter of the text and drag right to the center of the document.
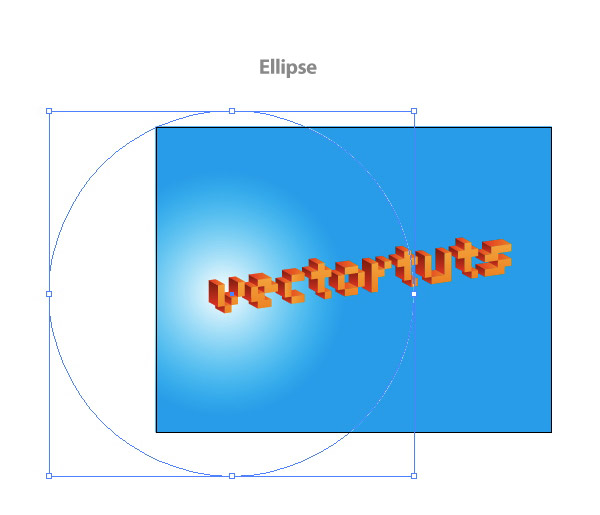
Step 18
Create an ellipse with the Ellipse Tool that is 730 px by 730 px with no fill and a white stroke, then place the center of the circle over the first letter of your text. Once placed, send the artwork behind the text.
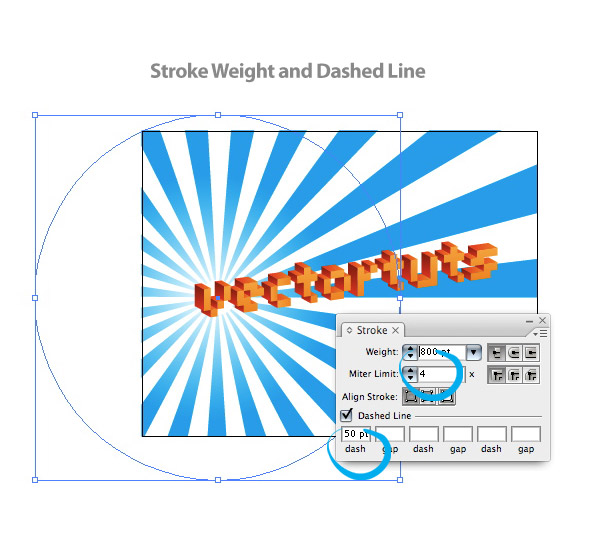
Step 19
With the ellipse selected, change the Stroke to 800 pt from the Stroke Panel. While still in the Stroke Panel, check the Dashed Line check box and change the Dash to 50 pt, giving you a nice radial burst.
Step 20
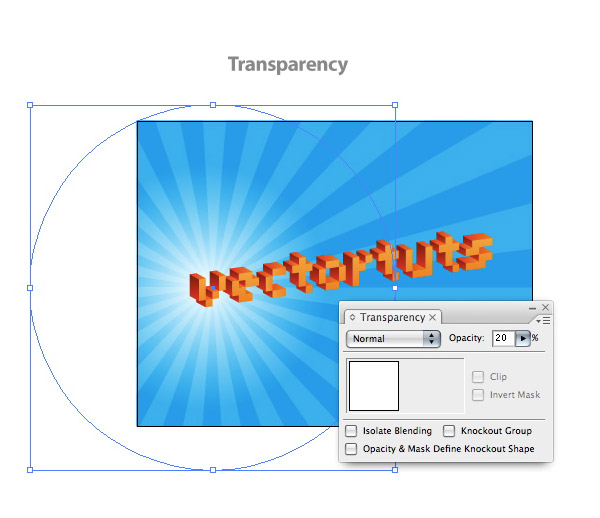
With the ellipse still selected, change the Transparency to 20% from the Transparency Panel.
Step 21
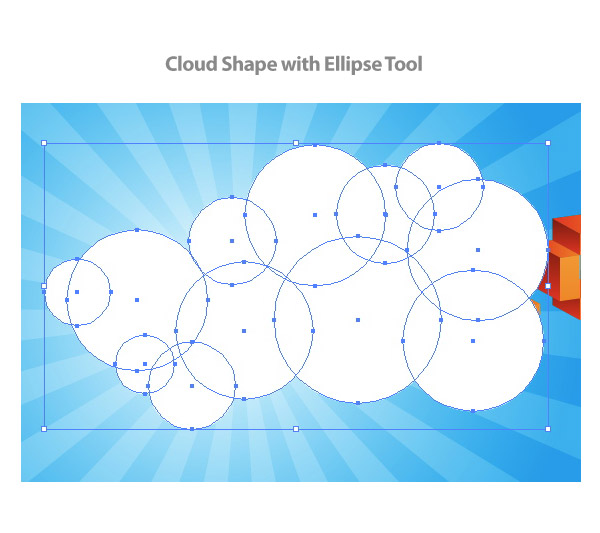
Now we can start creating the cloud shapes. With the Ellipse Tool (L), create ten to fifteen ellipses overlapping each other to create a cloud shape.
Step 22
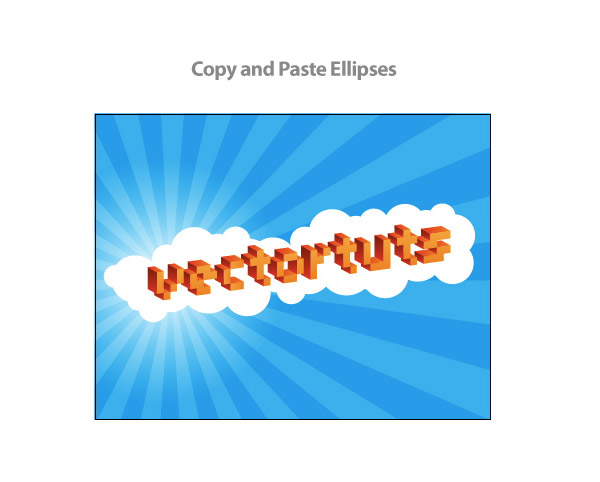
Send the set of ellipse behind the type, Copy (Command + C) and Paste (Command + V) the ellipses and place them around the text.
Step 23
Create another set of clouds with ellipses and send them behind the original clouds.
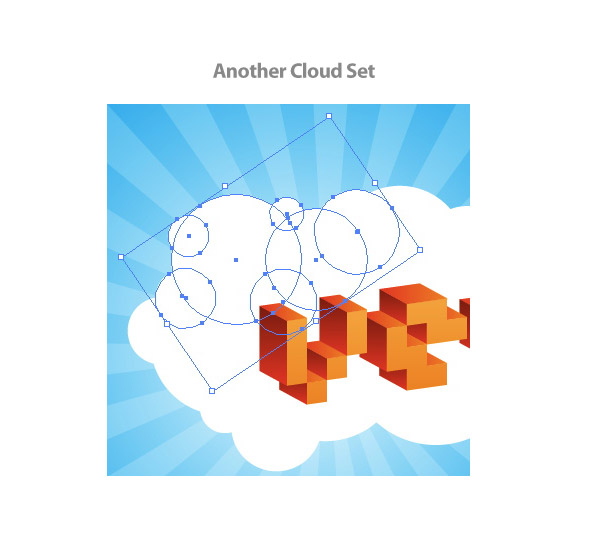
Step 24
With the new set of clouds selected, fill them with a Linear Blend with the first swatch white and the second a light blue.
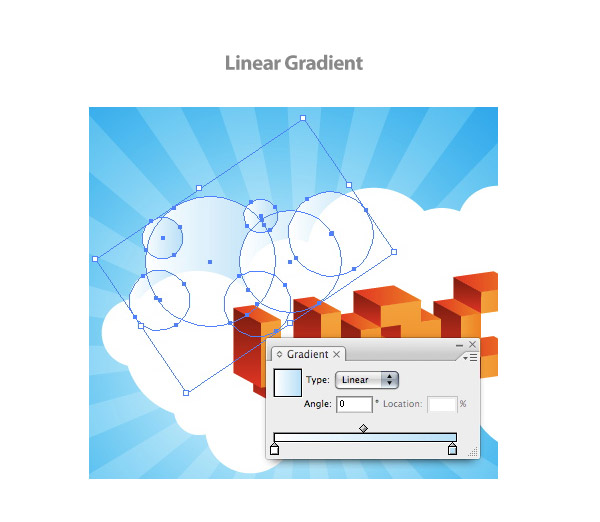
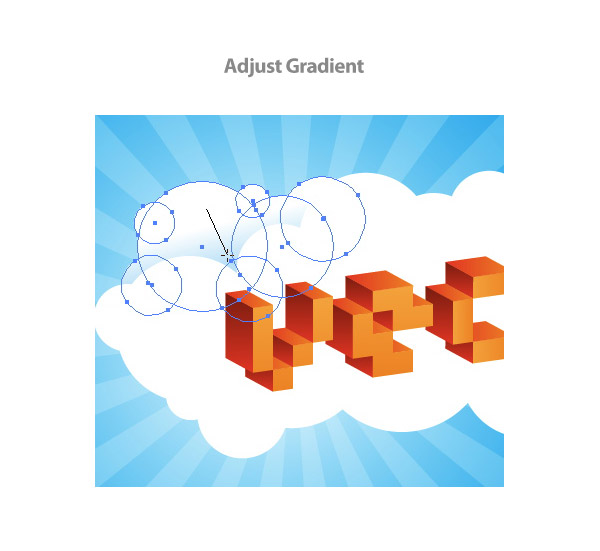
Step 25
With the Gradient Tool Adjust the gradient so the white is at the top of the clouds.
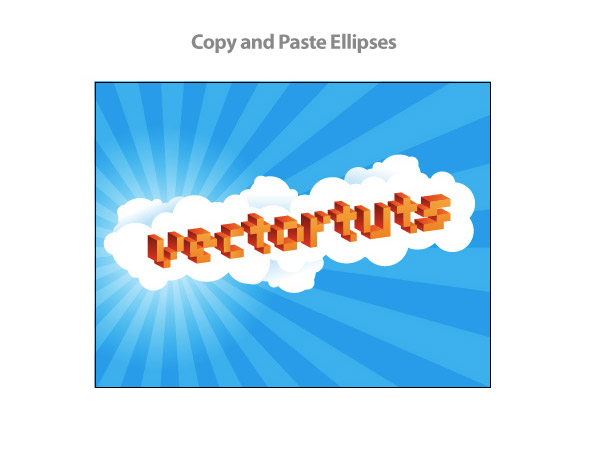
Step 26
Copy (Command + C) and Paste (Command + V) the gradient clouds a couple more times around the first set of clouds.
Step 27
Almost done, but let’s add some shadows to the text. Create an ellipse that is 70 px by 70 px. Fill the ellipse with a Radial Gradient, and make the first swatch if the gradient a dark cyan and the second swatch white.
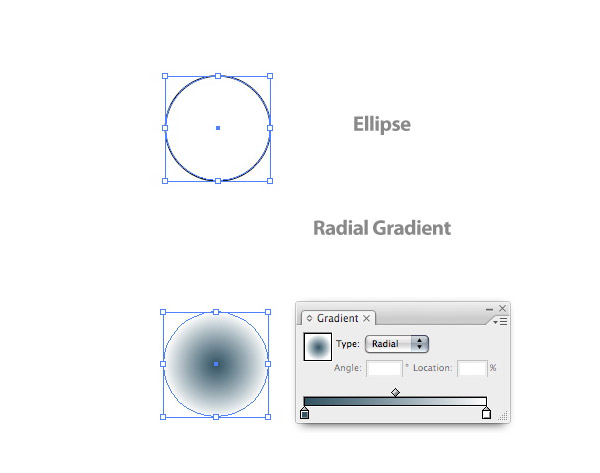
Step 28
With the Selection Tool (V), squish the ellipse to about a third of its original size and place it behind the bottom of the first letter.
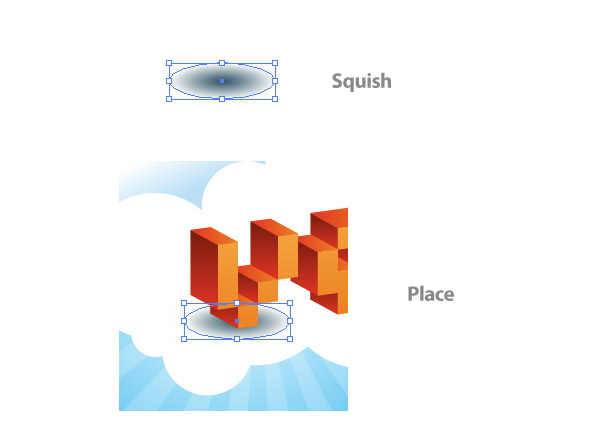
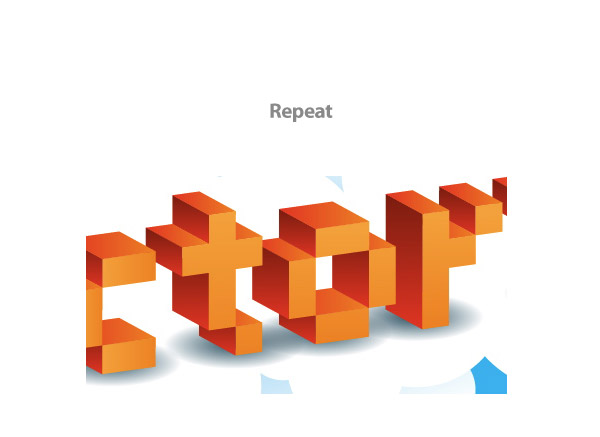
Step 29
Copy (Command + C) and Paste (Command + V) the ellipse under every letter. If the shadows overlap, chose Multiply from the menu. All done!
Final Image
Below is the final type treatment. I suggest trying this treatment with other fonts, or draw your own pixel letters to experiment!