

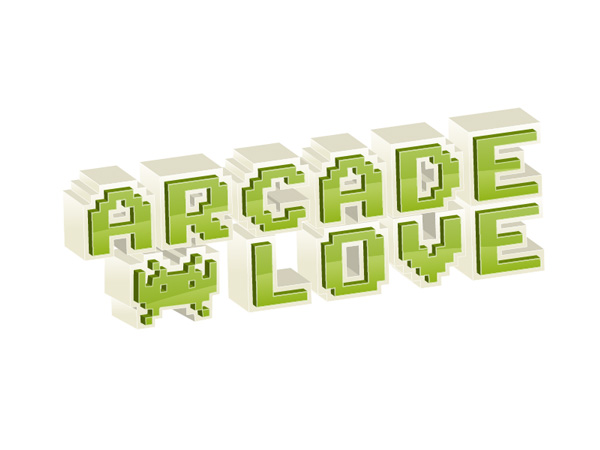
The final image
This is what we will be creating:

Step 1
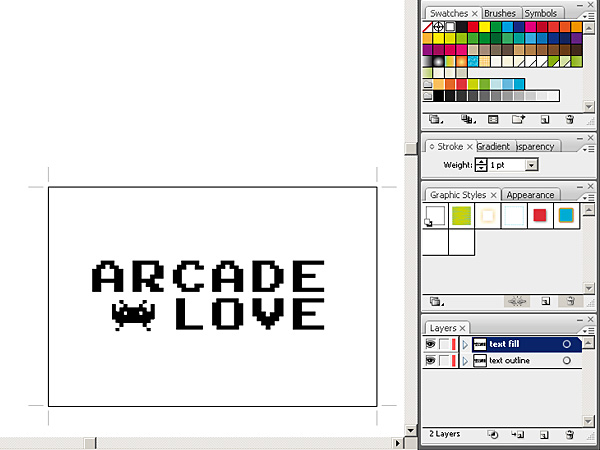
There are actually two ways to begin this illustration. You may draw all the blocky shapes with the pen tool or just download a blocky font like Arcade and Invaders from Space. I’m a man who values his time so I used the font instead of drawing.
Step 2
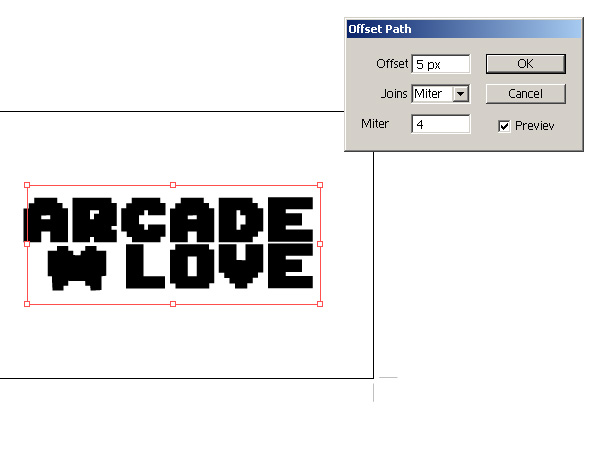
Duplicate the layer with the text on it. Name the original layer "text outline" and name the second one "text fill". "Text fill" layer should be on top of "text outline" in the layers panel.

Step 3
Make the "text fill" layer invisible and select all the contents of the "text outline" layer. Then go to Effec t > Path > Offset Path to make the text thicker. Type 5 px into the Offset parameter, leave the rest unchanged and click OK (you may need to input a higher offset value if your text is larger than mine).
Step 4
Fill the "text outline" layer with a creamy white colour like #F7F3DB. Make the "text fill" layer visible again and fill it with green colour like #96BD0D.

Step 5
Now we’re ready to take our typography into the third dimension. Select all the contents of the "text fill" layer and go to Effect > 3D > Extrude & Bevel.
Input: -18, -20, 8 as respective X, Y, Z values.
Set the extrusion to 10 pt and shading to Plastic. Extrude & Bevel the "text outline" layer with exactly the same parameters except the extrusion which should be set to 50 pt.
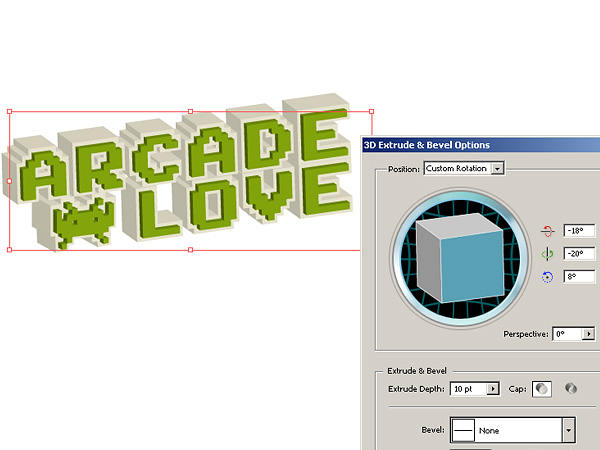
Align the layes, to obtain effect as in the picture below.

Step 6
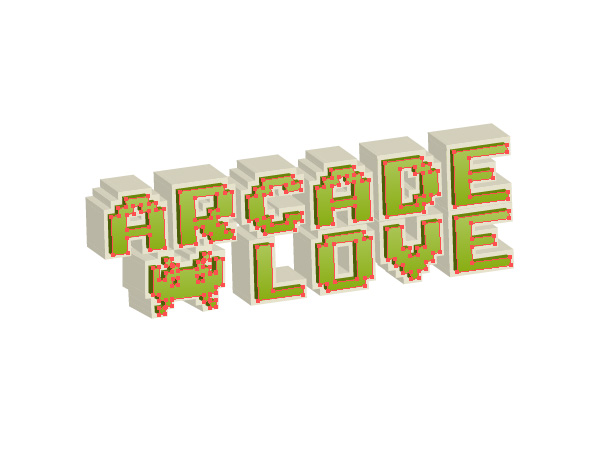
Select everything (Ctrl/Cmd+A) and go to Object>Expand Apperance. Now we will take care of lighting and specular reflections on our type.
Select every front of every green letter (like in the picture below) and give it a smooth light green gradient fill with 94 degrees angle. Colours of my gradient are #88AD11 (dark) and #ACC658 (light).
Step 7
Make the same selection as in the step before, preferably by selecting one object filled with the green gradient and going to Select>Same>Fill Color. Now this is going to be a weird operation because of how Illustrator handles copying, pasting and putting grouped objects on different layers, so follow those steps precisely.
Make a new layer on top of the other layers and name it "front outline".
Copy your selection and paste it in front (ctrl/cmd+F).
Now cut the selection, and paste it in front again (ctrl/cmd+F).
Give the selection a white stroke and no fill.
Select the "front outline" layer on the layers panel.
Now with the selection still active, click the right mouse button and select Arrange>Send to Current Layer.
If everything went allright you hould see a white stroke over your green letters like in the picture below.
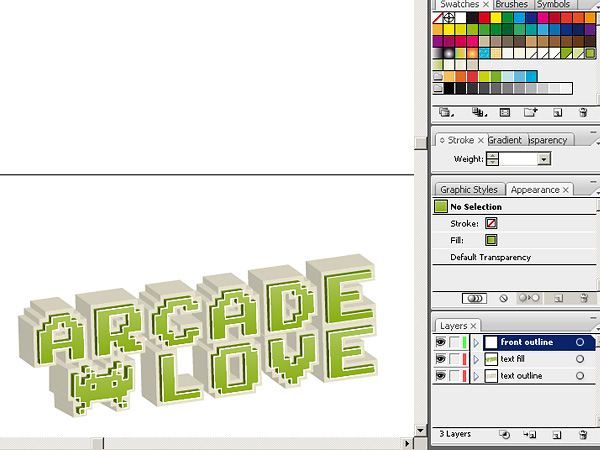
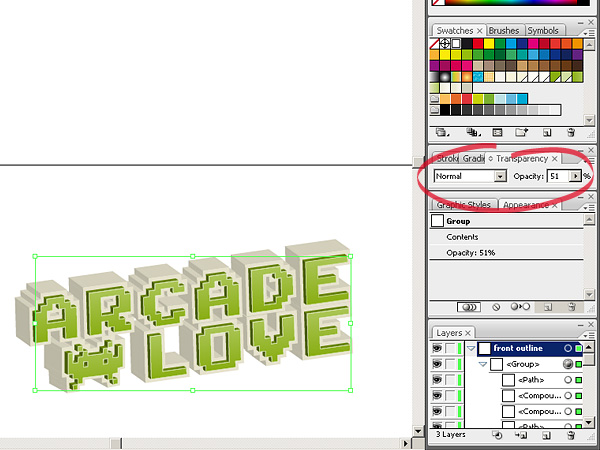
Step 8
Select every object on the "front outline" layer and group them. Change their stroke to 0,75 pt and opacity to about 50%.
Step 9
Make the "text fill" and "front outline" layers invisible. Pick the direct selection tool and select every front of every letter just like in step 6. Fill them with with a light creamy gradient (mine is from #ECE9D2 to #FDFCF7) with 94 degrees angle and give theam a really thin white stroke. 0,25 pt would be just right.
Step 10
Now we have to select every edge that is facing the top like in the picture below and give them a light brownish fill (#E0DDC8). This won’t be an easy process since Illustrator has a really weird manner of cutting 3D objects into milions of little bits and pieces… Just focus, be precise and remember that you can always save your selection by using Select>Save Selection.
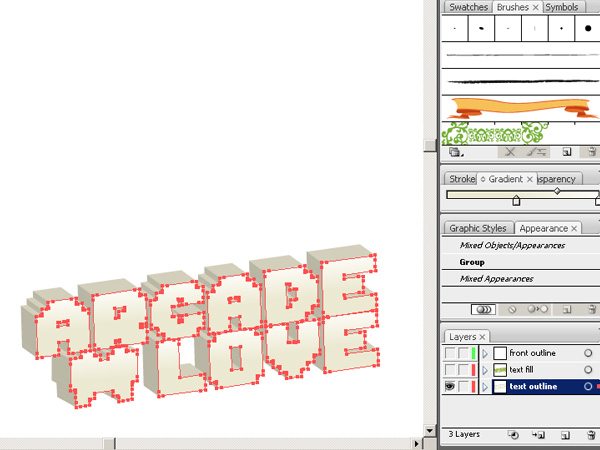
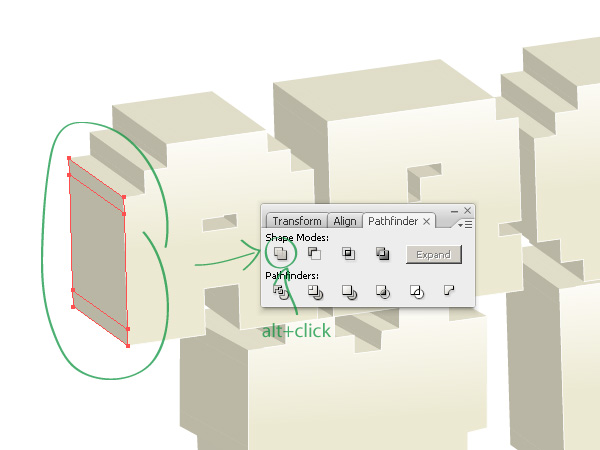
Step 11
Before we proceed we need to tidy up the mess that Illustrator left us after Expanding the 3D efect. If you take a close look you will notice that every left facing edge of our leters is cut into 3 or 2 pieces. We will be filling those edges with a gradient in the next step, so each one of them has to be constructed of a single object, not three…
You need to use the Pathfinder to combine the edges into a single object. On every letter make a selection like in the picture below and use Pathfinders "Add to shape area" option and then click Expand, or just Alt+Click the first option to expand the shape automaticaly.
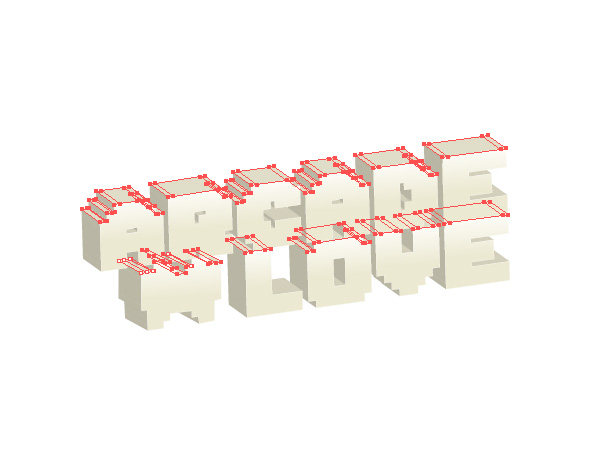
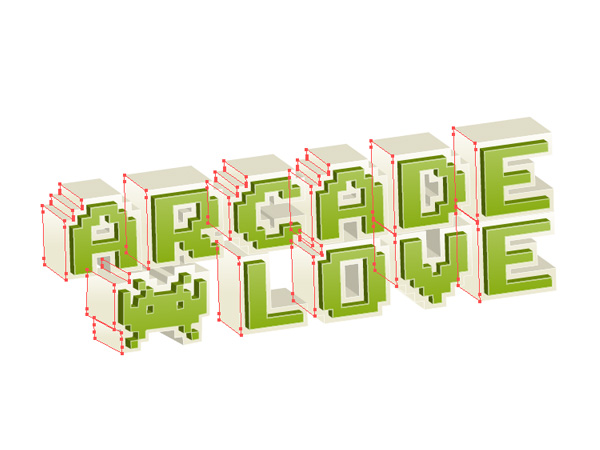
Step 12
Now if you merged all the unnecessary shapes you have to select every edge that faces left except for the inner edges of the letters. If you’re confused just do this like in the picture below. After selecting the edges fill them with a gradient from Step 9 (from #ECE9D2 to #FDFCF7, 90 degrees).
Step 13
Turn on visibility of every layer. Duplicate the "front outline" layer and name it "specular reflection". Select every object on the newly created layer and turn off their strokes and fills.
We’ll use this layer as a clipping mask for our reflections.

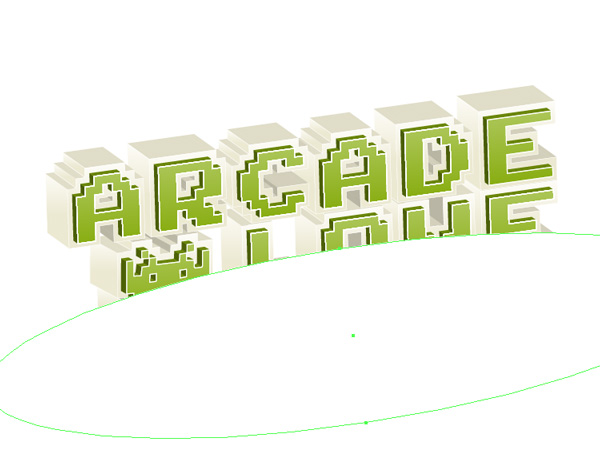
Step 14
Select the Ellipse Tool to draw a wide, white ellipse on the "specular reflection" layer and adjust its rotation as in the picture below.
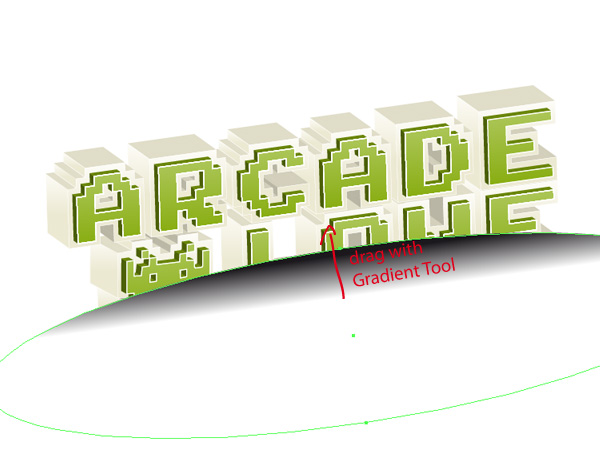
Step 15
Copy the white ellipse and paste it in front (ctrl/cmd+F). Fill it with a linear white to black gradient and use the Gradient Tool to adjust the gradient to the picture below.
Step 16
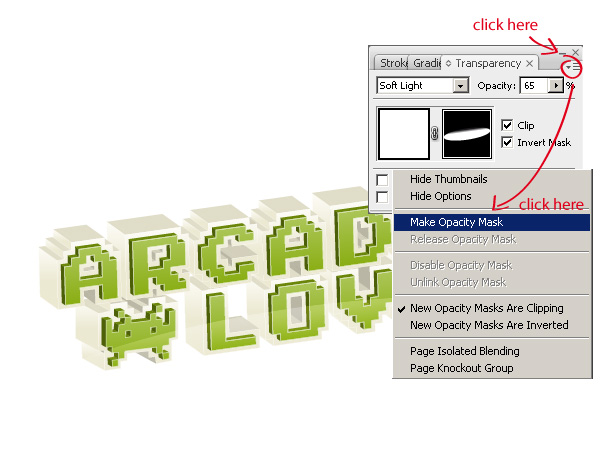
Select the both ellipses, go to the Transparency palette, click the "triangle menu" and select Make Opacity Mask. Tick the Invert Mask option, adjust opacity to about 65% and select Soft Light as the blending mode. Your result should be similar to the picture below:
Step 17
Our typography is getting all shiny but we are not quite finished. There is one thing that we need to fix. The reflection should be visible only on the front of the green letters:
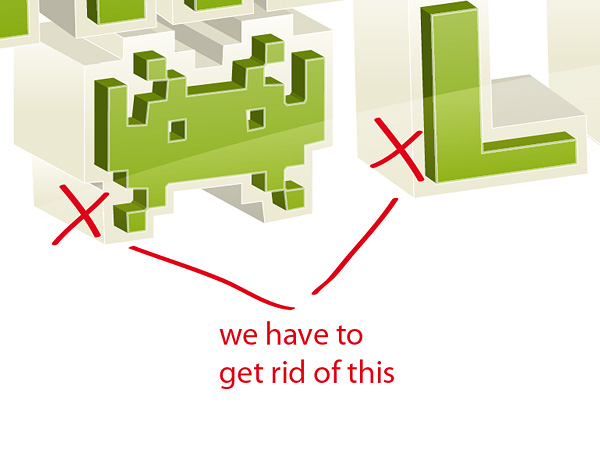
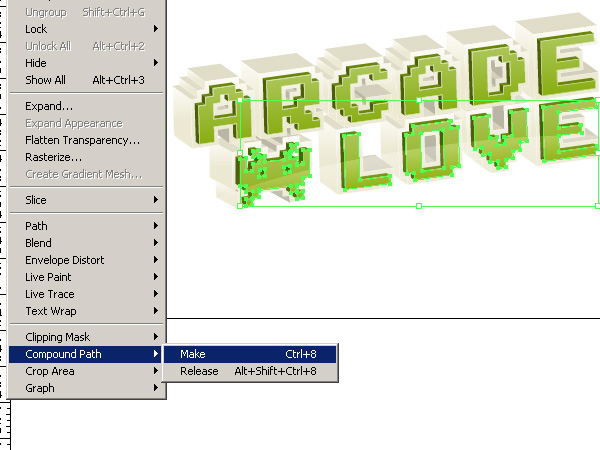
To fix the problem lock every layer besides the "specular reflection" and select the lower part of the typography (the space invader, L, O, V and E). Then rightclick, select Arrange>Bring to Front, and press ctrl/cmd+8 or go to Object>Compound Path>Make to make a compound path out of this selection.
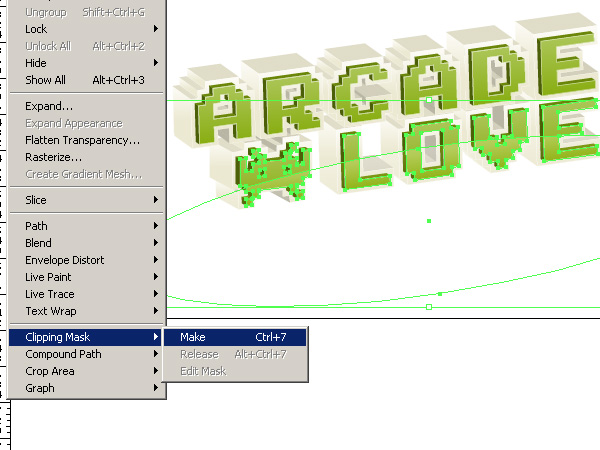
With the compound path selected add the white opaque ellipse to the selection and press ctrl/cmd+7 or go to Object>Clipping Mask>Make. The reflection is ready.
Step 18
Now copy the white ellipse and position it over the top part of the typography. You also need to adjust its width so it fits like in the picture below.
Step 19
Select the top letters (Arcade), bring them to front, and make a Compound Path out of them just like in Step 17 (ctrl/cmd+8). Then select the compound path and the ellipse and make a clipping mask just like in Step 17 (ctrl/cmd+7).
Step 20
The typography is ready so now all we need is a background, actually I made mine in Photoshop, because it was quicker and easier to obtain the effect that I wanted.
Make a new Photoshop file, create a new layer, fill it with white. Go back to Illustrator, select everything (ctr/cmd+A) and paste it to Photoshop as a Smart Object.
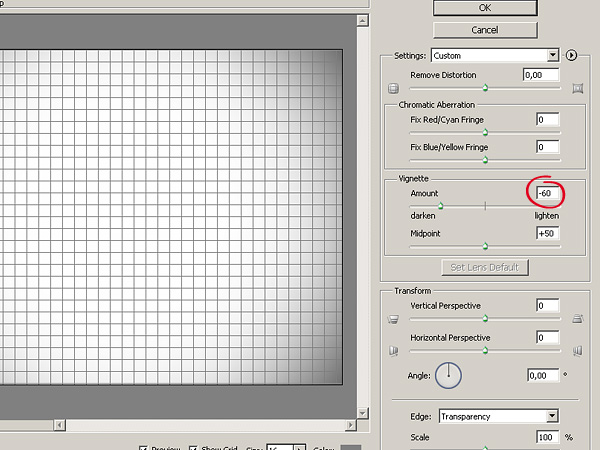
In Photoshop, select the white layer, go to Filter>Distort>Lens Correction and set the vignette amount to – 60
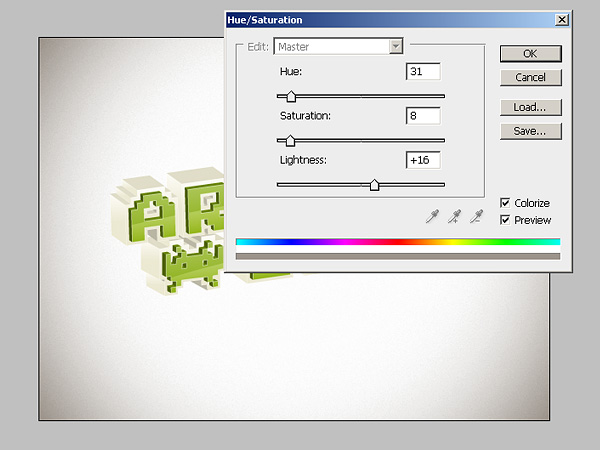
To make the vignette less gray we will colorize it with the Hue/Saturation adjustment layer. So create new Hue/Saturation adjustment layer and input the following values:
Step 21
This is the end of the tutorial I hope you liked it, and learned a few new techniques. Here is the result