

Final Product What You’ll Be Creating
Step 1
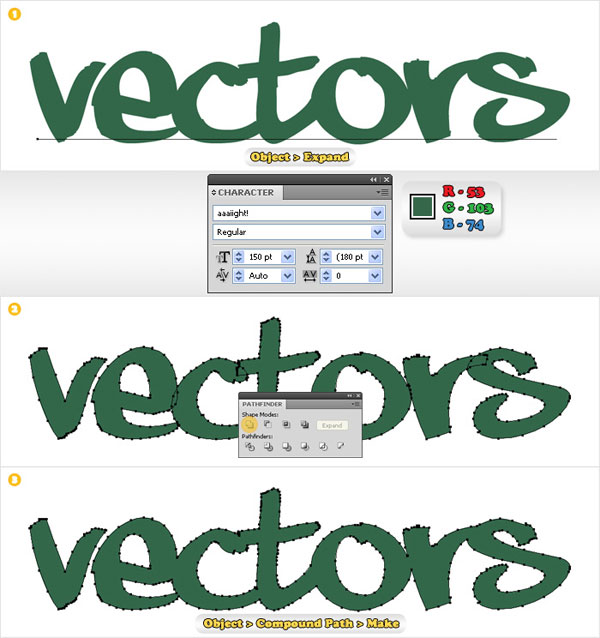
First, download the Aaaiight! font and move in your Fonts directory. Then, create a 700 by 300px document, pick the Type Tool (T) and click on your Artboard. Enter your text, follow the data shown below, change its color to R=53 G=103 B=74 then go to Object > Expand. Select the resulting group of shapes, click on the Unite button from the Pathfinder panel then go to Object > Compound Path > Make.
Step 2
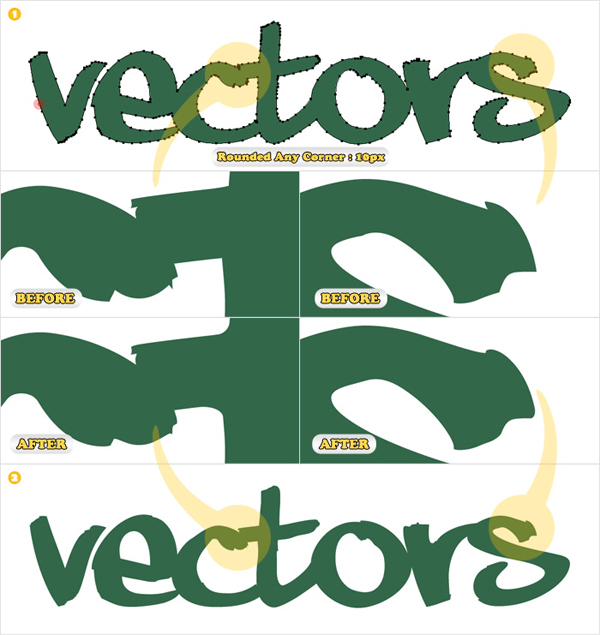
Next, you need to add discrete roundness effect for the shape made in the previous step. In order to do it you’ll need the Round Any Corner Script. Save it to your hard drive, select the entire shape then pick the Direct Selection Tool (A). Hold Shift and click on one of the anchor points to deselect it. Now, with the rest of the anchor points still selected, go to File > Scripts > Other Script. Open the Round Any Corner Script, enter a 10px Radius and click OK. Double click on the resulting shape (in the Layers panel) and name it "vectors" (or whatever word you used).
Step 3
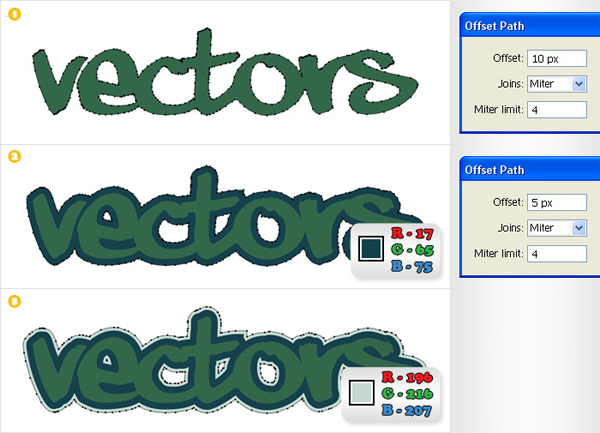
Select "vectors" and go to Object > Path > Offset Path. Enter a 10px Offset and click OK. Select the resulting shape, fill it with R=17 G=65 B=75, name it "vectors.dark" then go again to Object > Path > Offset Path. Enter a 5px Offset and click OK. Select the resulting shape, fill it with R=196 G=216 B=207 and name it "vectors.light".
Step 4
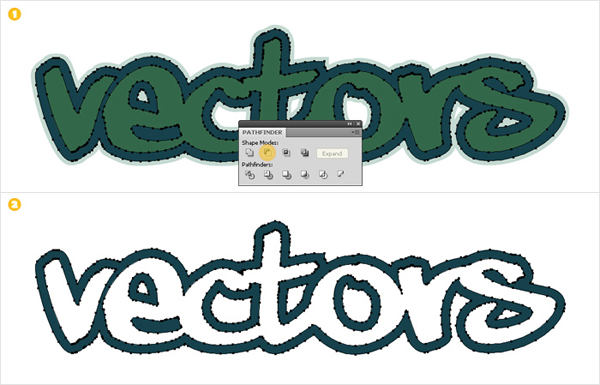
Duplicate "vectors" (Control + C > Control + F). Select this copy along with "vectors.dark" and click on the Minus Front button from the Pathfinder panel. The resulting shape should look like in the second image. Rename it "vectors.dark".
Step 5
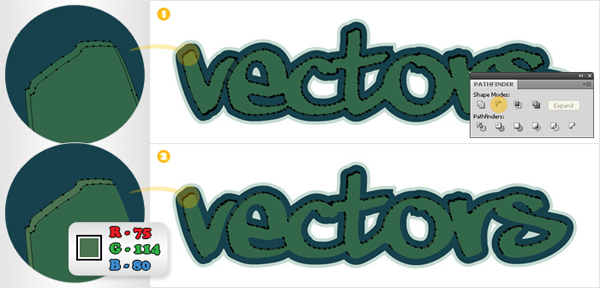
Make another two copies of "vectors". Go to Edit > Preferences > General and enter "1" in the Keyboard Increment box. Select the top copy and hit the down arrow and the right arrow once (to move it 1px down and to the right). Reselect both copies and click on the Minus Front button from the Pathfinder panel. Fill the resulting group of shapes with R=75 G=114 B=80.
Step 6
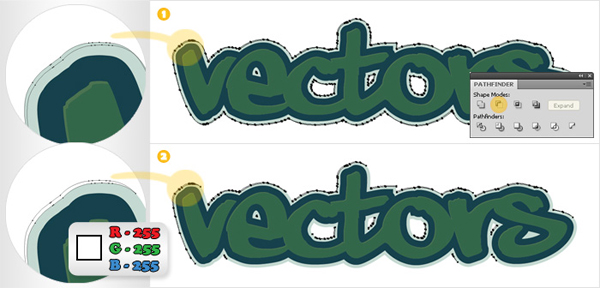
Now, make two copies of "vectors.light". Again, select the top copy and move it 1px down and to the right. Reselect both copies and click on the Minus Front button from the Pathfinder panel. Fill the resulting group of shapes with white.
Step 7
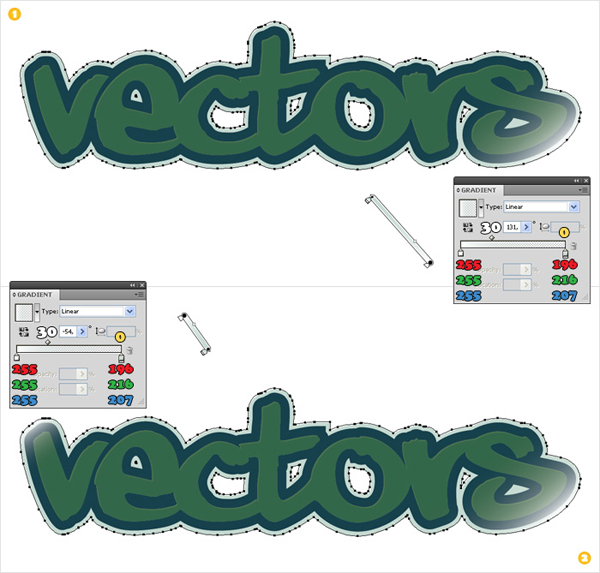
Make a new copy of "vectors.light" and Bring it to Front (Shift > Control > Right Square Bracket). Replace the fill color with the linear gradient shown in the following image. With the shape still selected go to the Appearance panel. Open the flyout menu and click on Add New Fill. This should add a second fill for your shape. Select it and use the same linear gradient but with a different angle. Take a closer look at the gradient. The white text stands for Location and the yellow text stands for Opacity.
Step 8
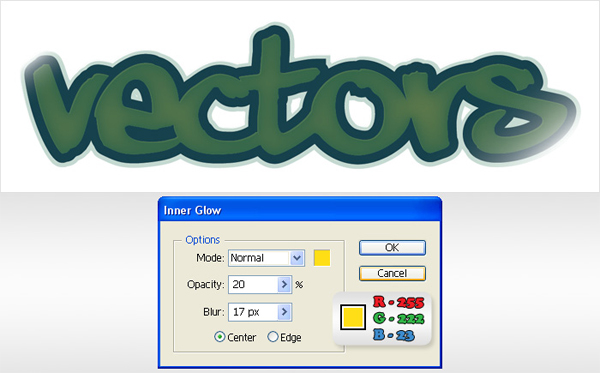
Select "vectors" and go to Effect > Stylize > Inner Glow. Enter the data shown below and click OK.
Step 9
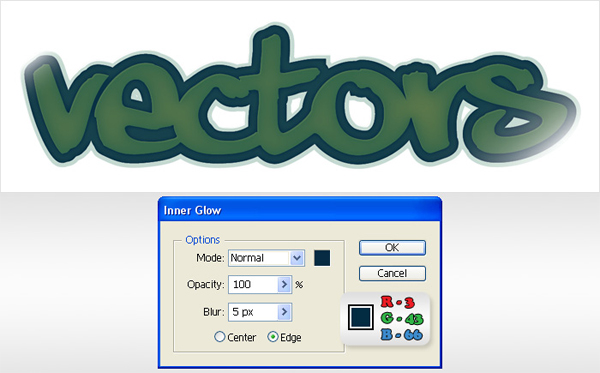
Select "vectors.dark" and go to Effect > Stylize > Inner Glow. Enter the data shown below and click OK.
Step 10
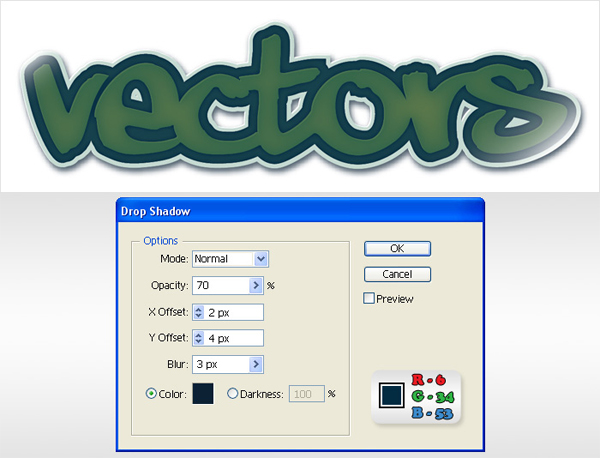
Select "vectors.light" and go again to Effect > Stylize > Drop Shadow. Enter the data shown below and click OK.
Step 11
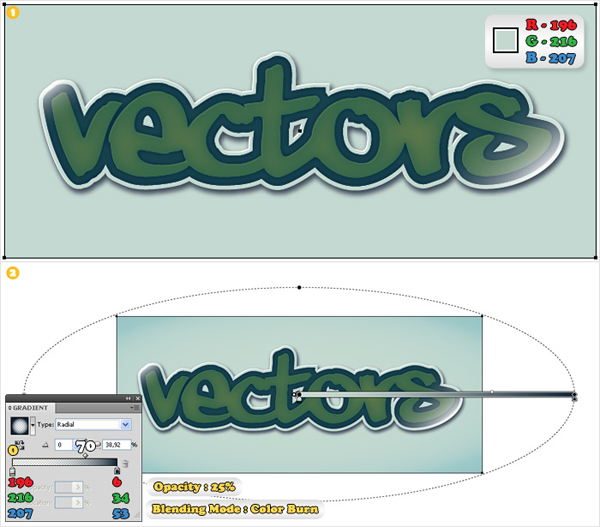
Finally, for the background, use the Rectangle Tool (M). Create a shape the size of your Artboard (700 by 300px), Send it to the Back (Shift > Control > Left Square Bracket) and fill it with R=196 G=216 B=207. Select this rectangle, add a new fill and use the radial gradient shown in the second image. Select the second fill (from the Appearance panel), lower its opacity to 25% and change its blending mode to Color Burn.
Conclusion
So there you have it, a simple way to make a sticker text effect. Try playing around with different fonts and shapes to come up with new and interesting variations on this style!